| |
|
1
Work
begins in earnest -
 |
2016 9 19 Work
begins in earnest -
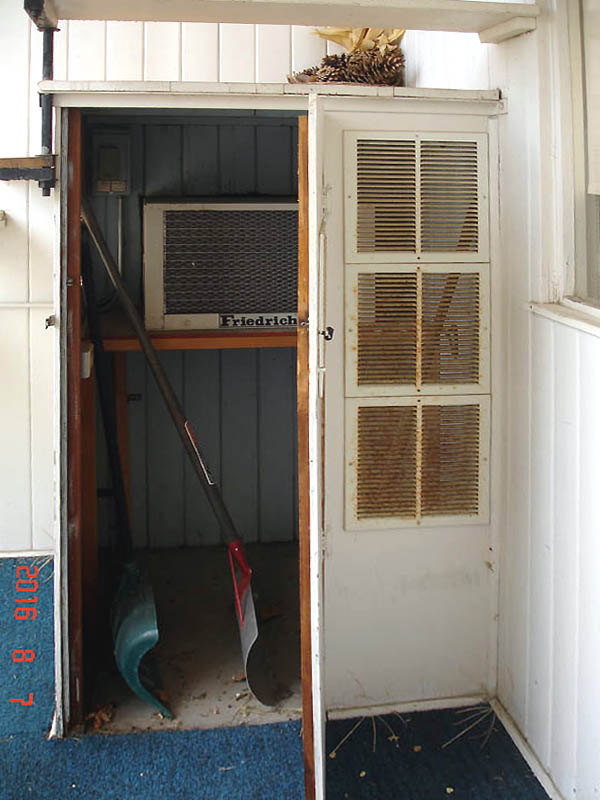
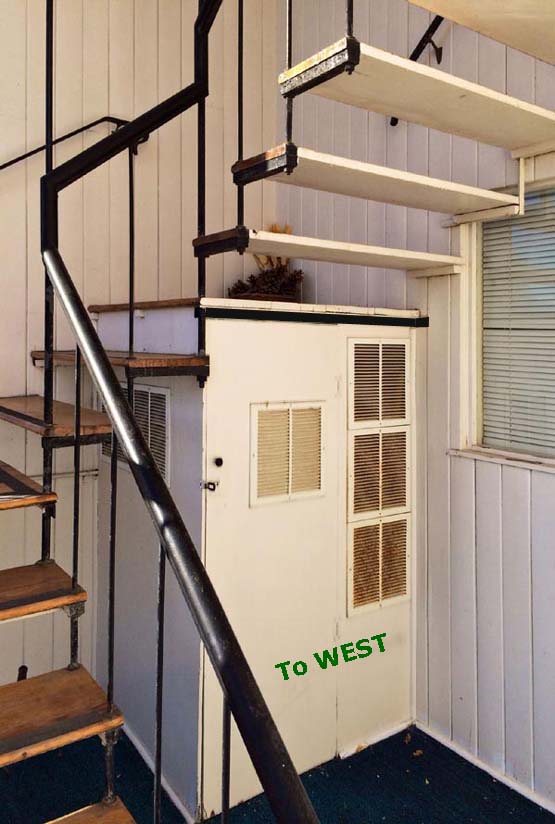
There used to be a utility closet / storage shed...
... and here used to be a window-type air
conditioner inside the utility closet.
... now, with the utility closet & its enclosed air-conditioner out of the way,
there's a hole in the wall now. The elevator entrance will be here
and things can now begin in earnest. (It's unusual to have an air
conditioner protrude into a utility closet, but that's how it was here.)
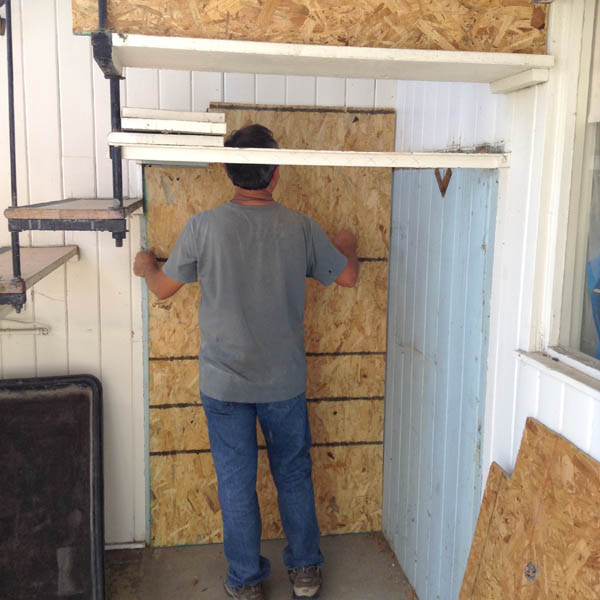
But first Daniel and Carlos will need install a plastic dust barrier
in the room downstairs; then the real work can begin. |
|
|
|
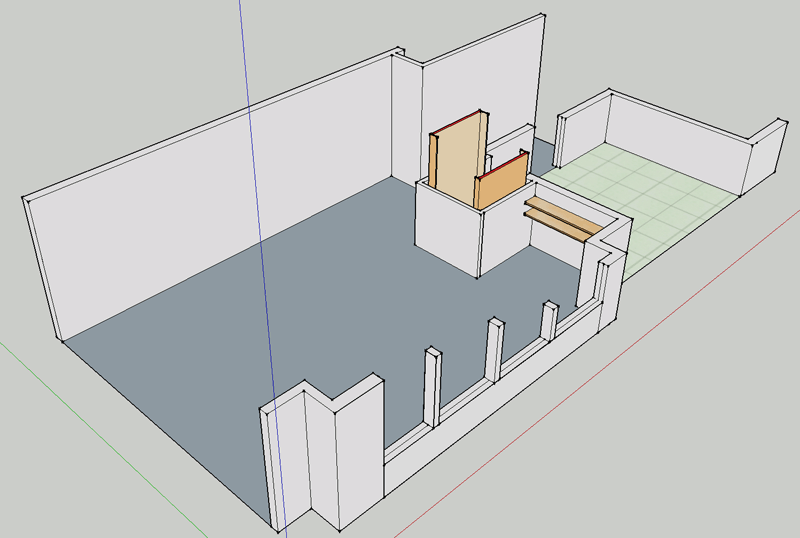
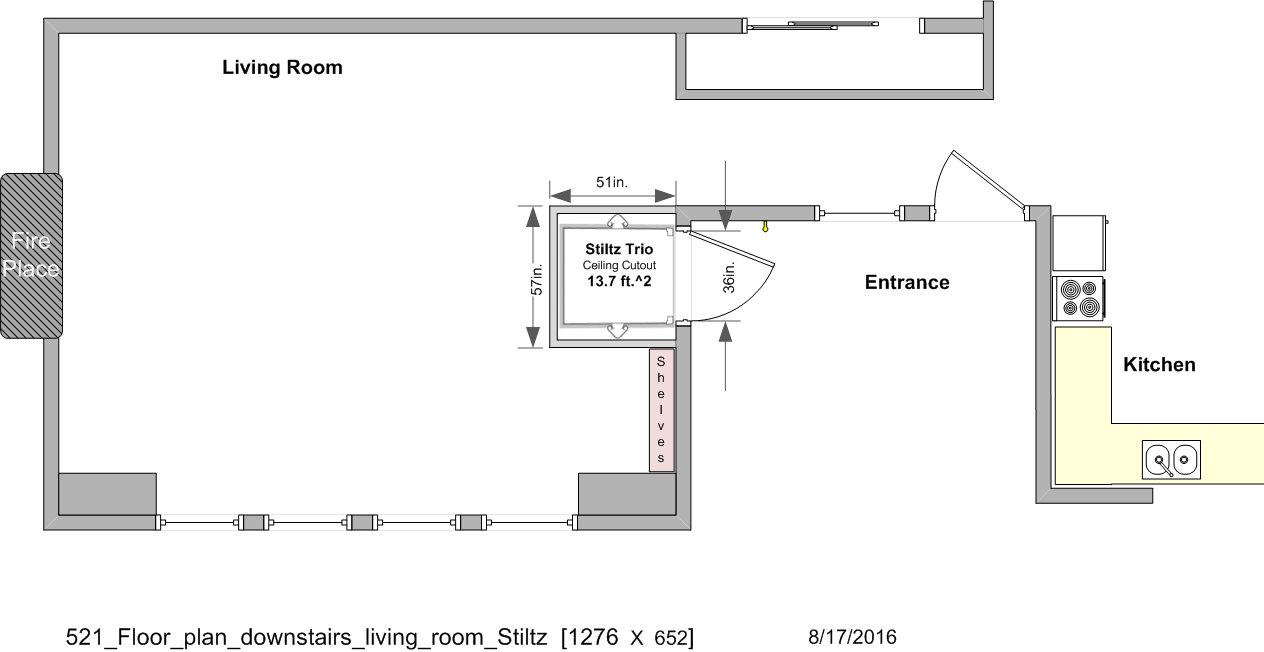
This is the layout downstairs.
The elevator will encroach on the downstairs living room.
You can see it (yellow) enclosed in its downstairs elevator
shaft.
There will also be some new shelves (yellow). |
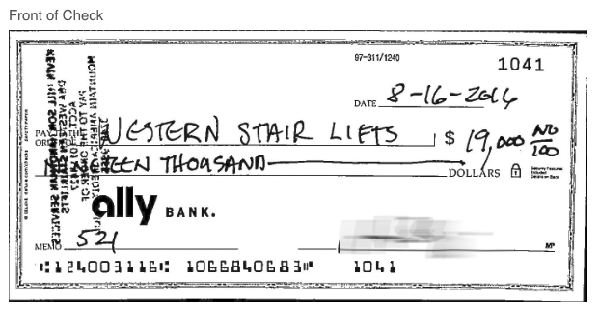 
Let's bite the
bullet and write a down payment to STILTZ' installer,
Western Stair Lifts, to get things going!
Eighty-three (83) days later, I was able to write
the final check.
Everything to be done by STILTZ had been accomplished.
Total cost of elevator plus construction was $47,107.
|
|
 |
|
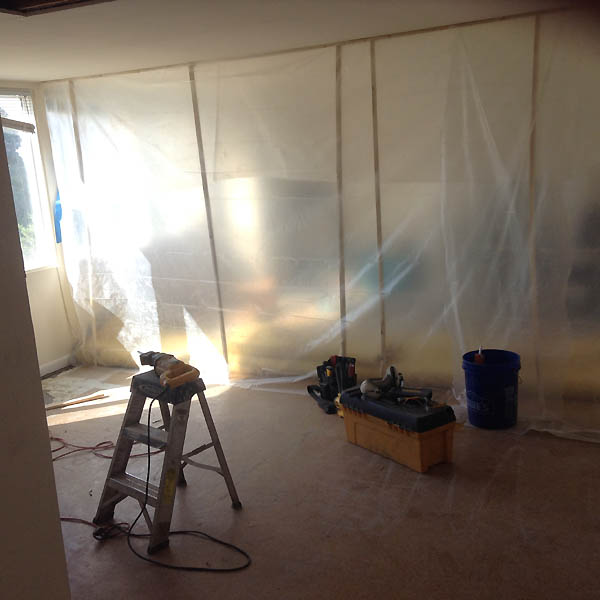
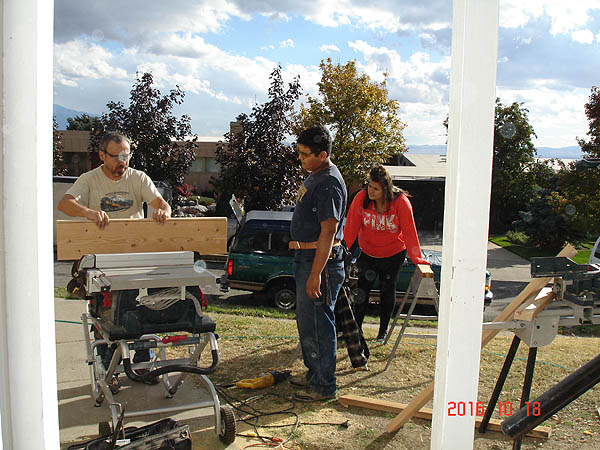
Daniel and Carlos installed a plastic dust barrier downstairs.
This is where it's going to
happen, the building of the elevator shaft -- in the downstairs living room.
With a plastic curtain, the team corralled the dust and muck
from the rest of the downstairs dwelling. |
2
 |
|
3
 |
4

The layout... thinking. It's the biggest part of the
project.
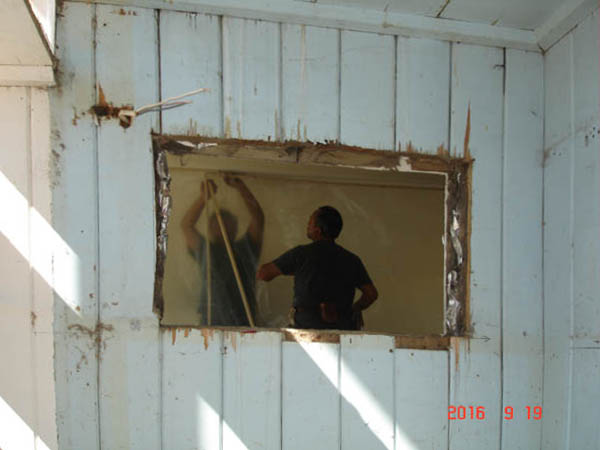
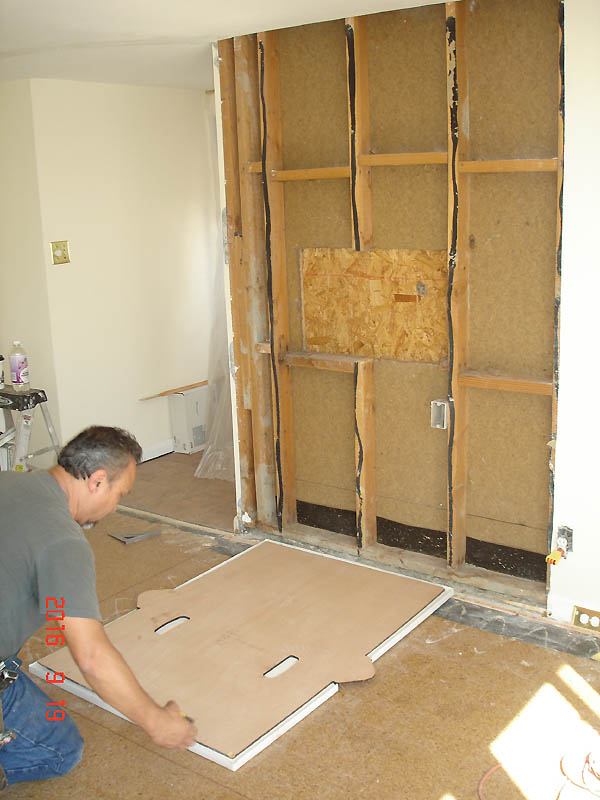
 As seen from the downstairs living room, the sheet rock is
now gone from the wall where the air conditioner was. That's where
the new elevator entrance will be. Daniel is concentrating on the
layout. Stiltz provided some plywood templates to help with
that laying-out-procedure.
As seen from the downstairs living room, the sheet rock is
now gone from the wall where the air conditioner was. That's where
the new elevator entrance will be. Daniel is concentrating on the
layout. Stiltz provided some plywood templates to help with
that laying-out-procedure. |
|
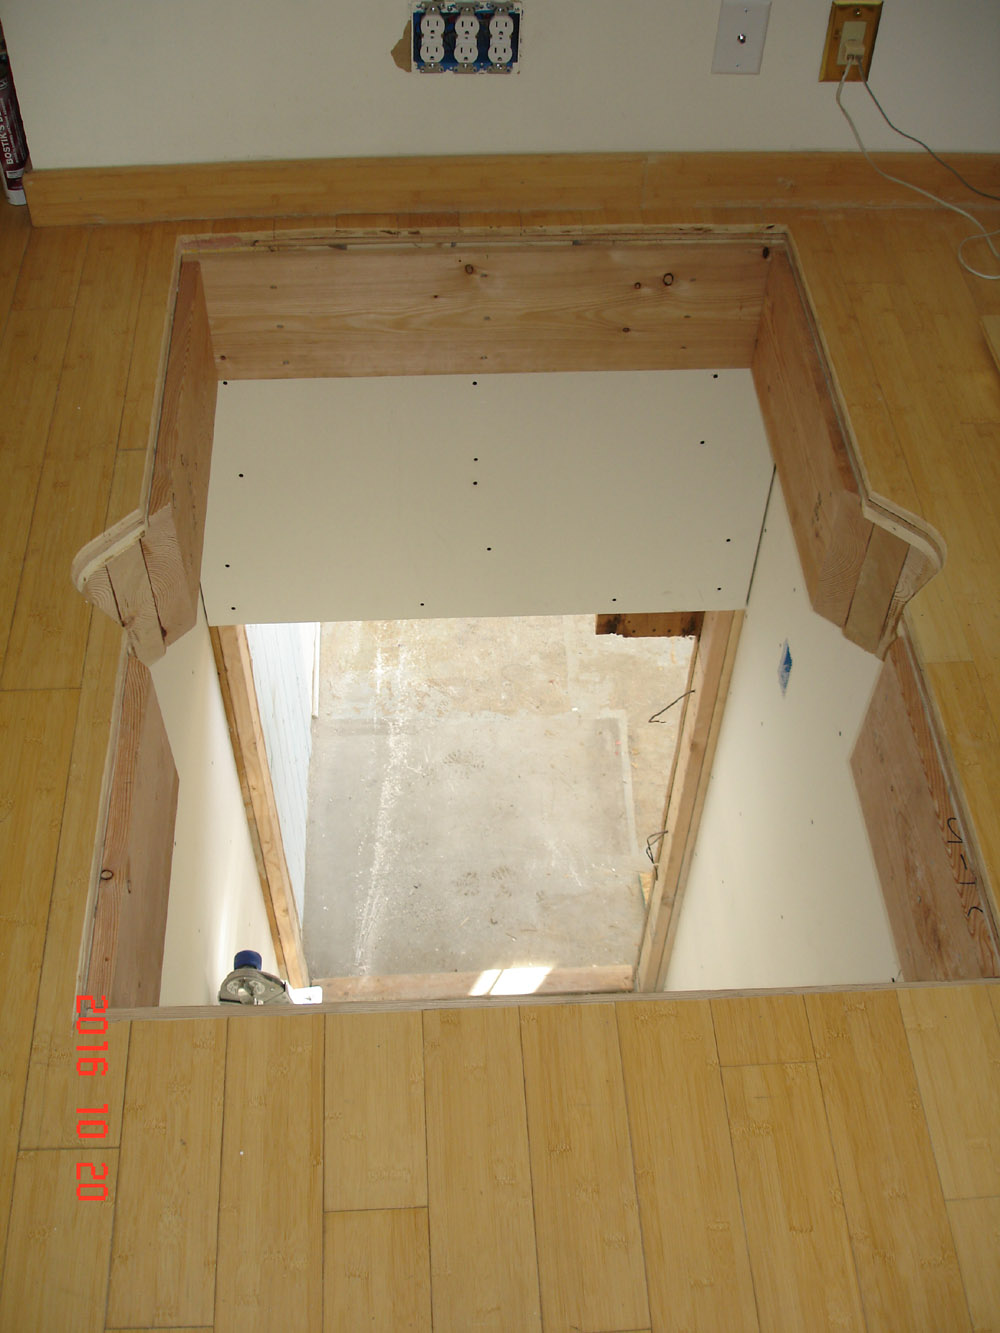
The utility
closet under the outside stairs has been removed and a space has been
cut out for the elevator entrance.
The entrance to the elevator is
going to be here, under the stairs.
There's a temporary "door".
Through Daniel's head, in this view, is a stair
step.

He'll bump his head. That's gotta change - the stairs will have to
be reconfigured -
 |
 |
|
- - - Click images to
enlarge |
|
5
 |
|
Meanwhile, back at the ranch...
|
|
Before
Work in progress ...
There's a toe-trip on the
walkway. Not good for wheel chair access!
That thing needs to go...
|
After
Finished.
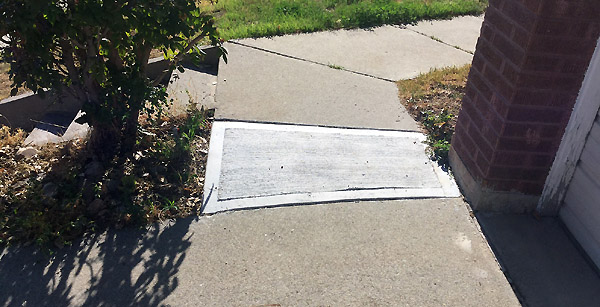
...That thing went.
|
|
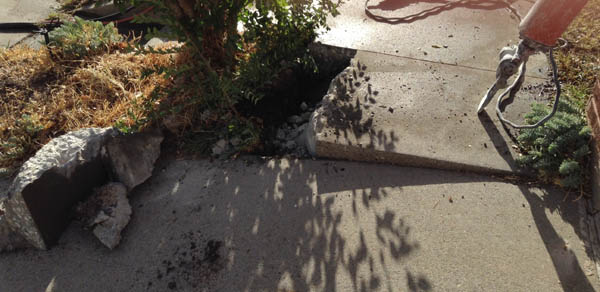
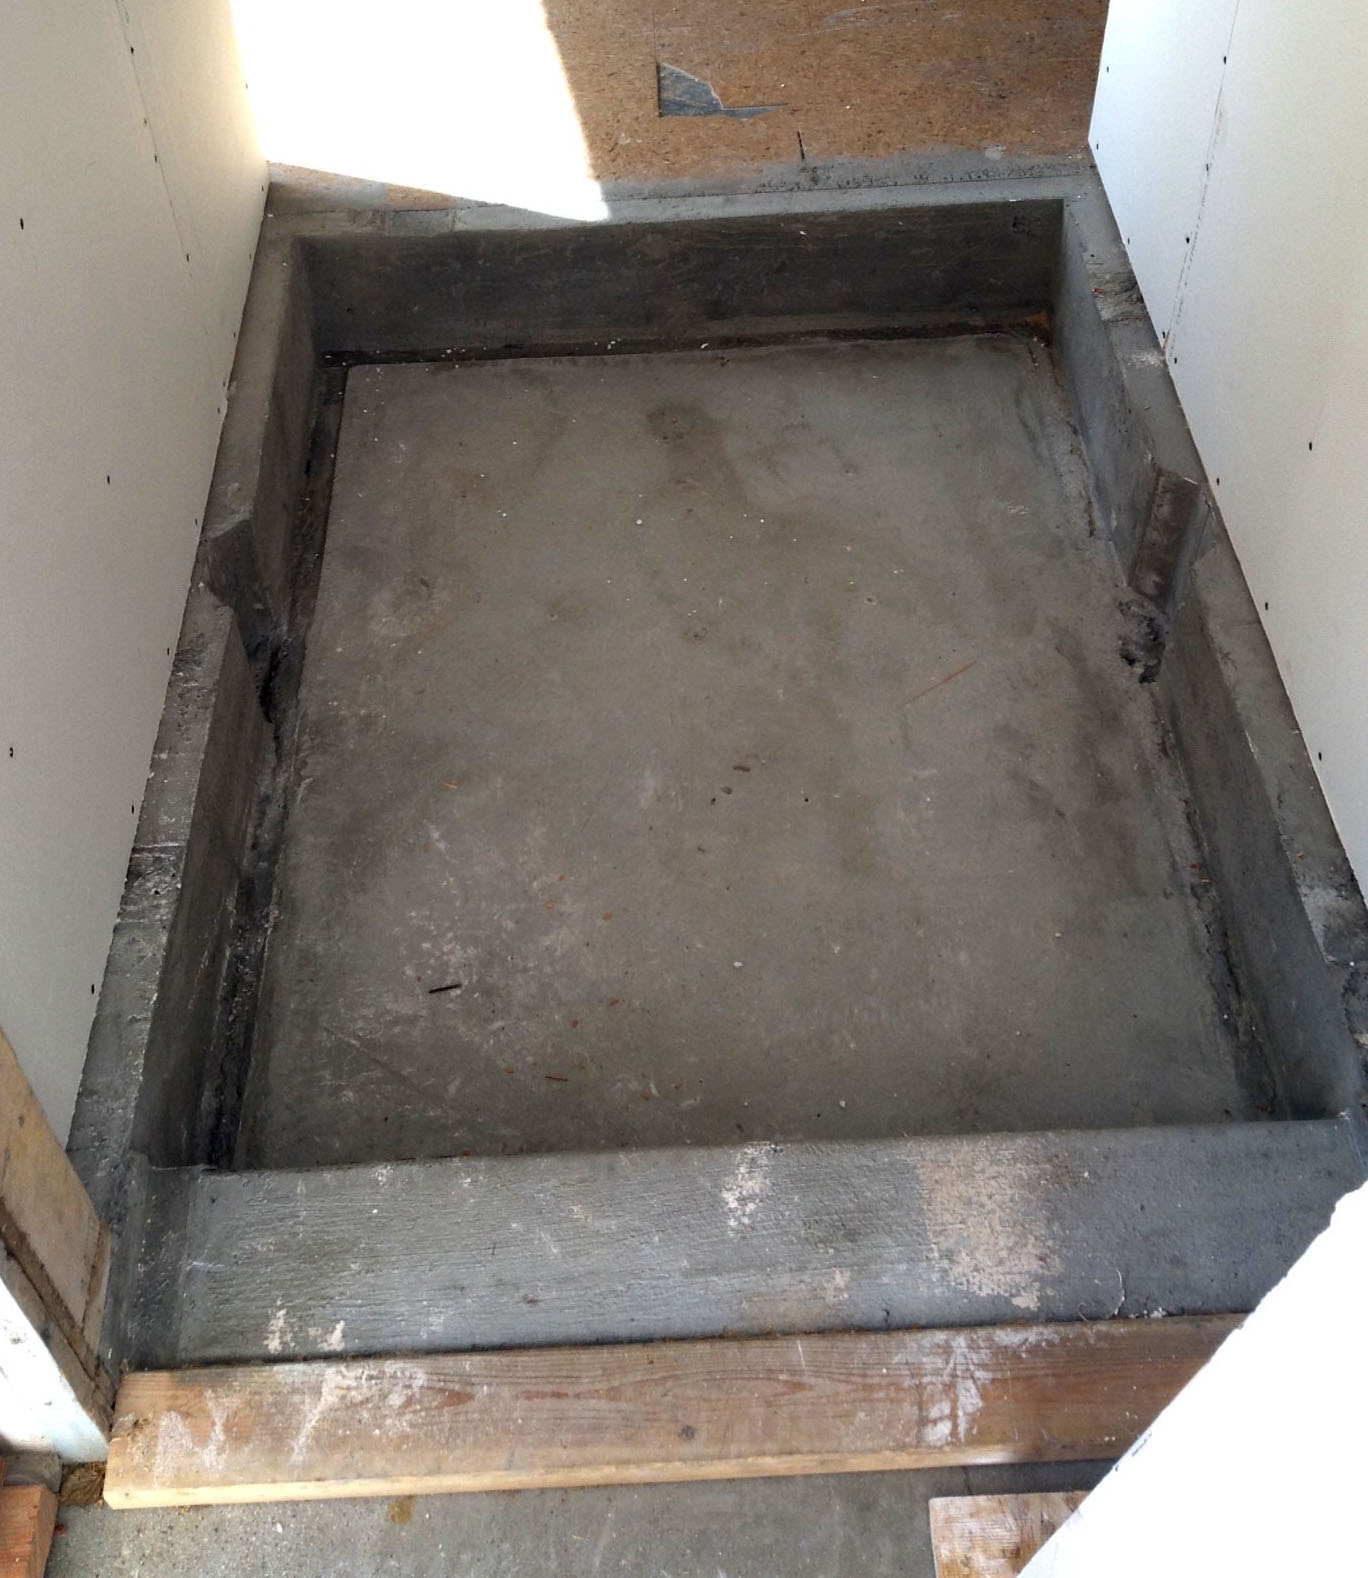
There needs to be an elevator pit - |
|
6
Cutting the concrete for the
elevator pit.
It's not very deep.
(We don't want a step up to enter the thing.) |
There is to be a shallow pit underneath the
building to allow level entrance.
Preview.
|
|
|
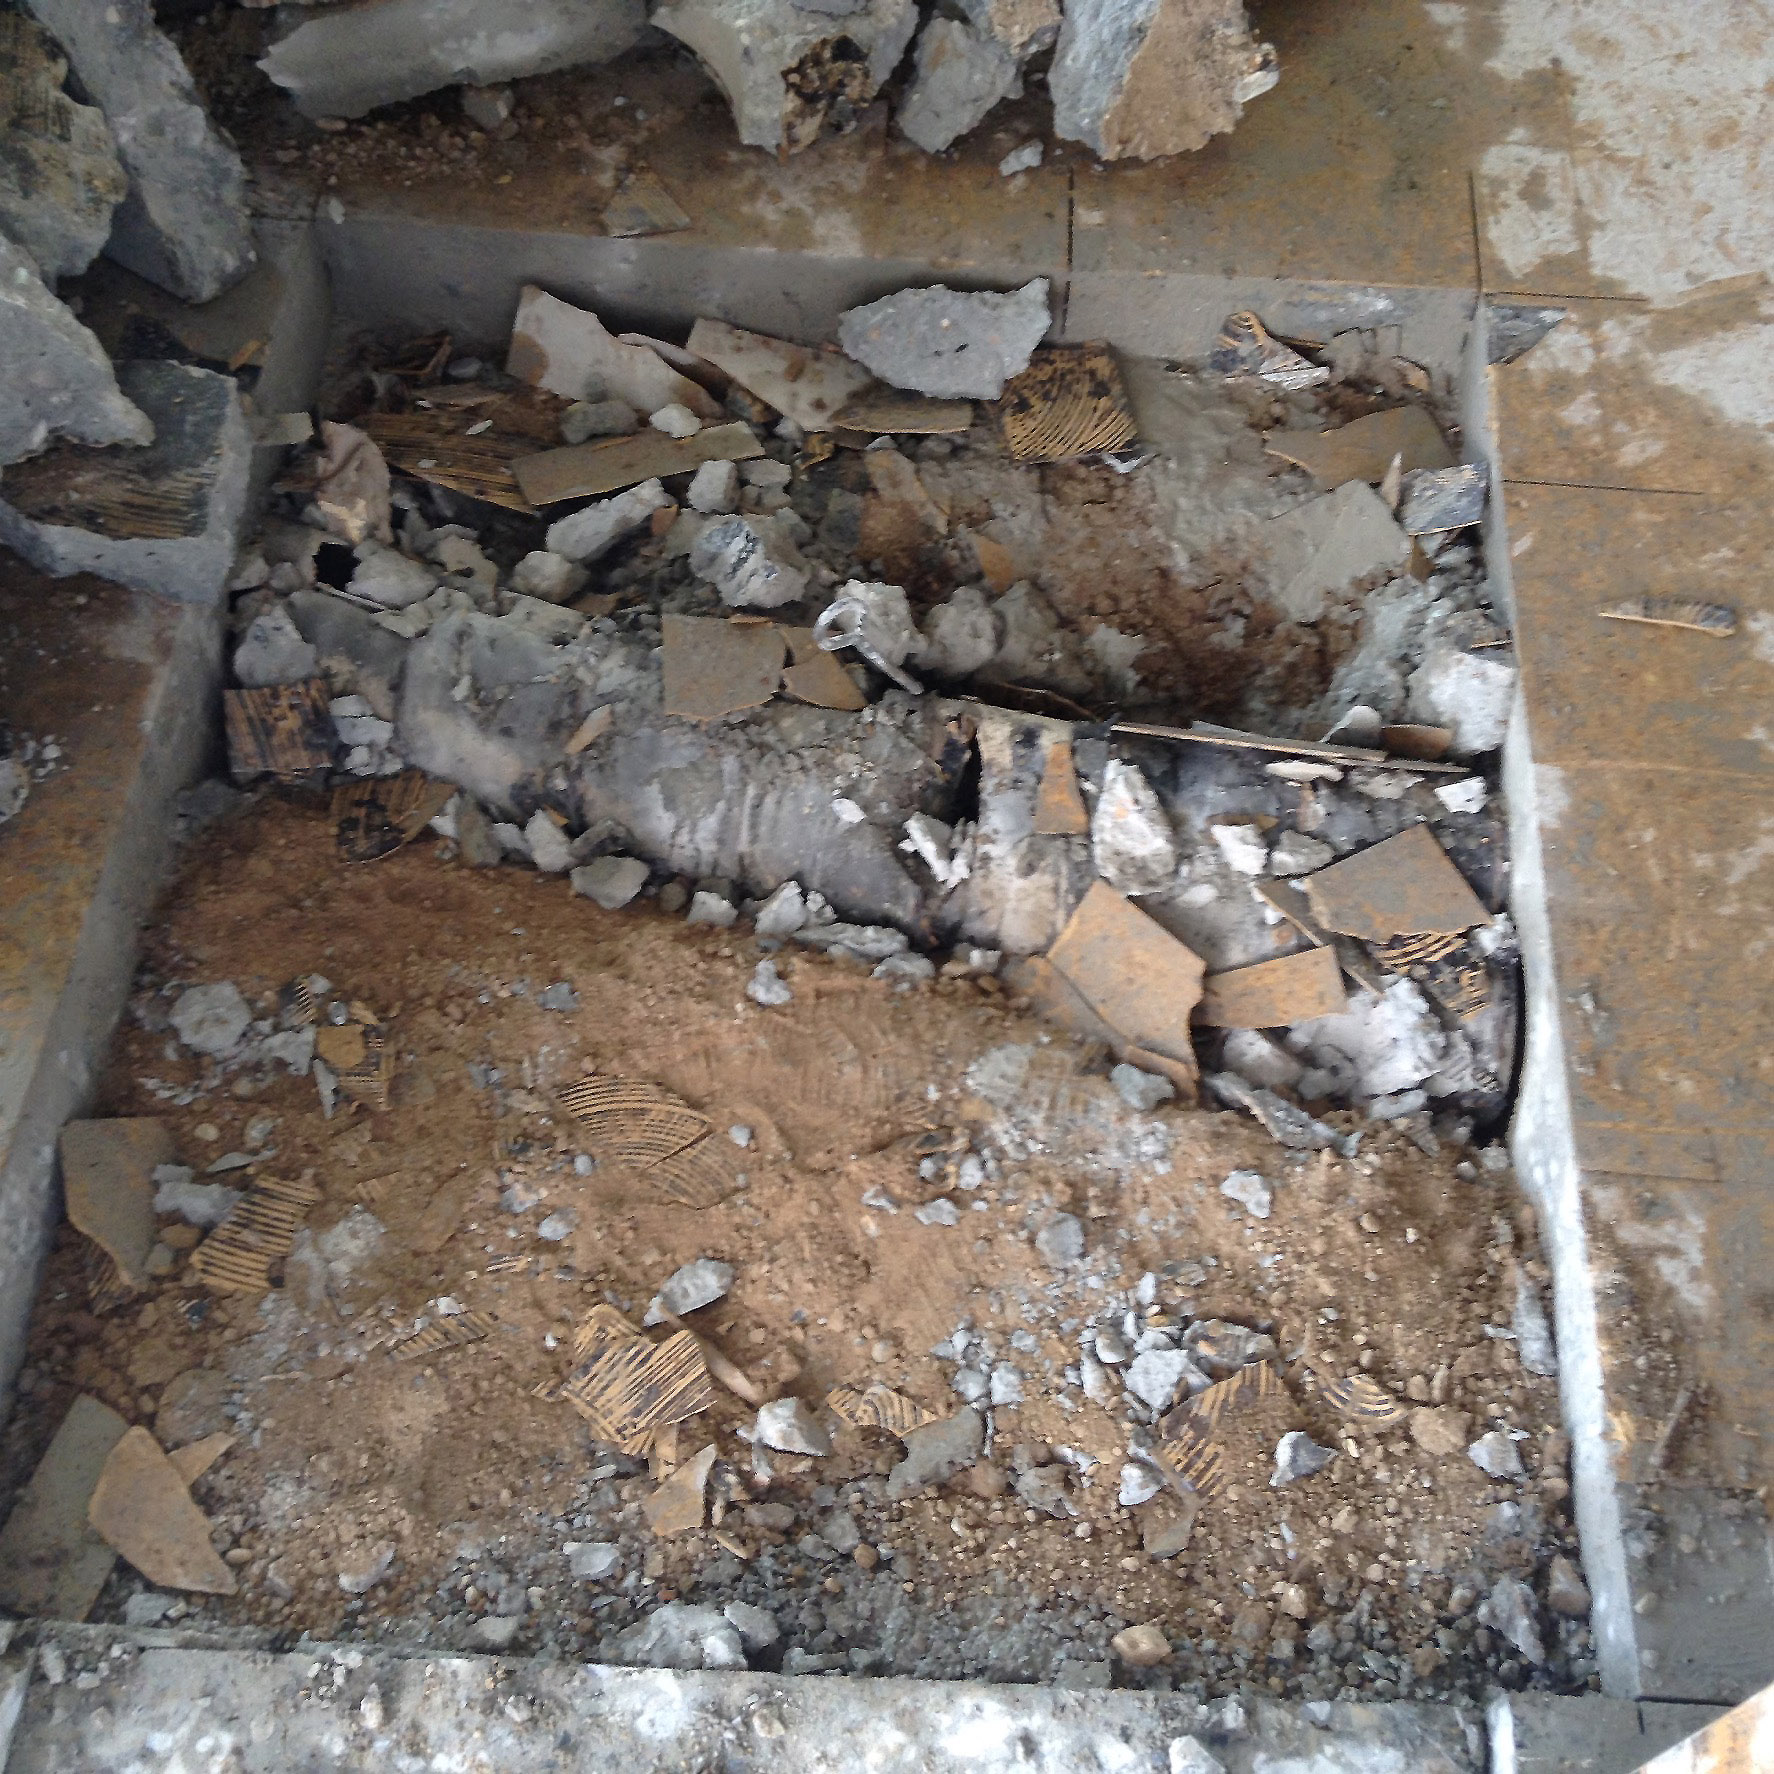
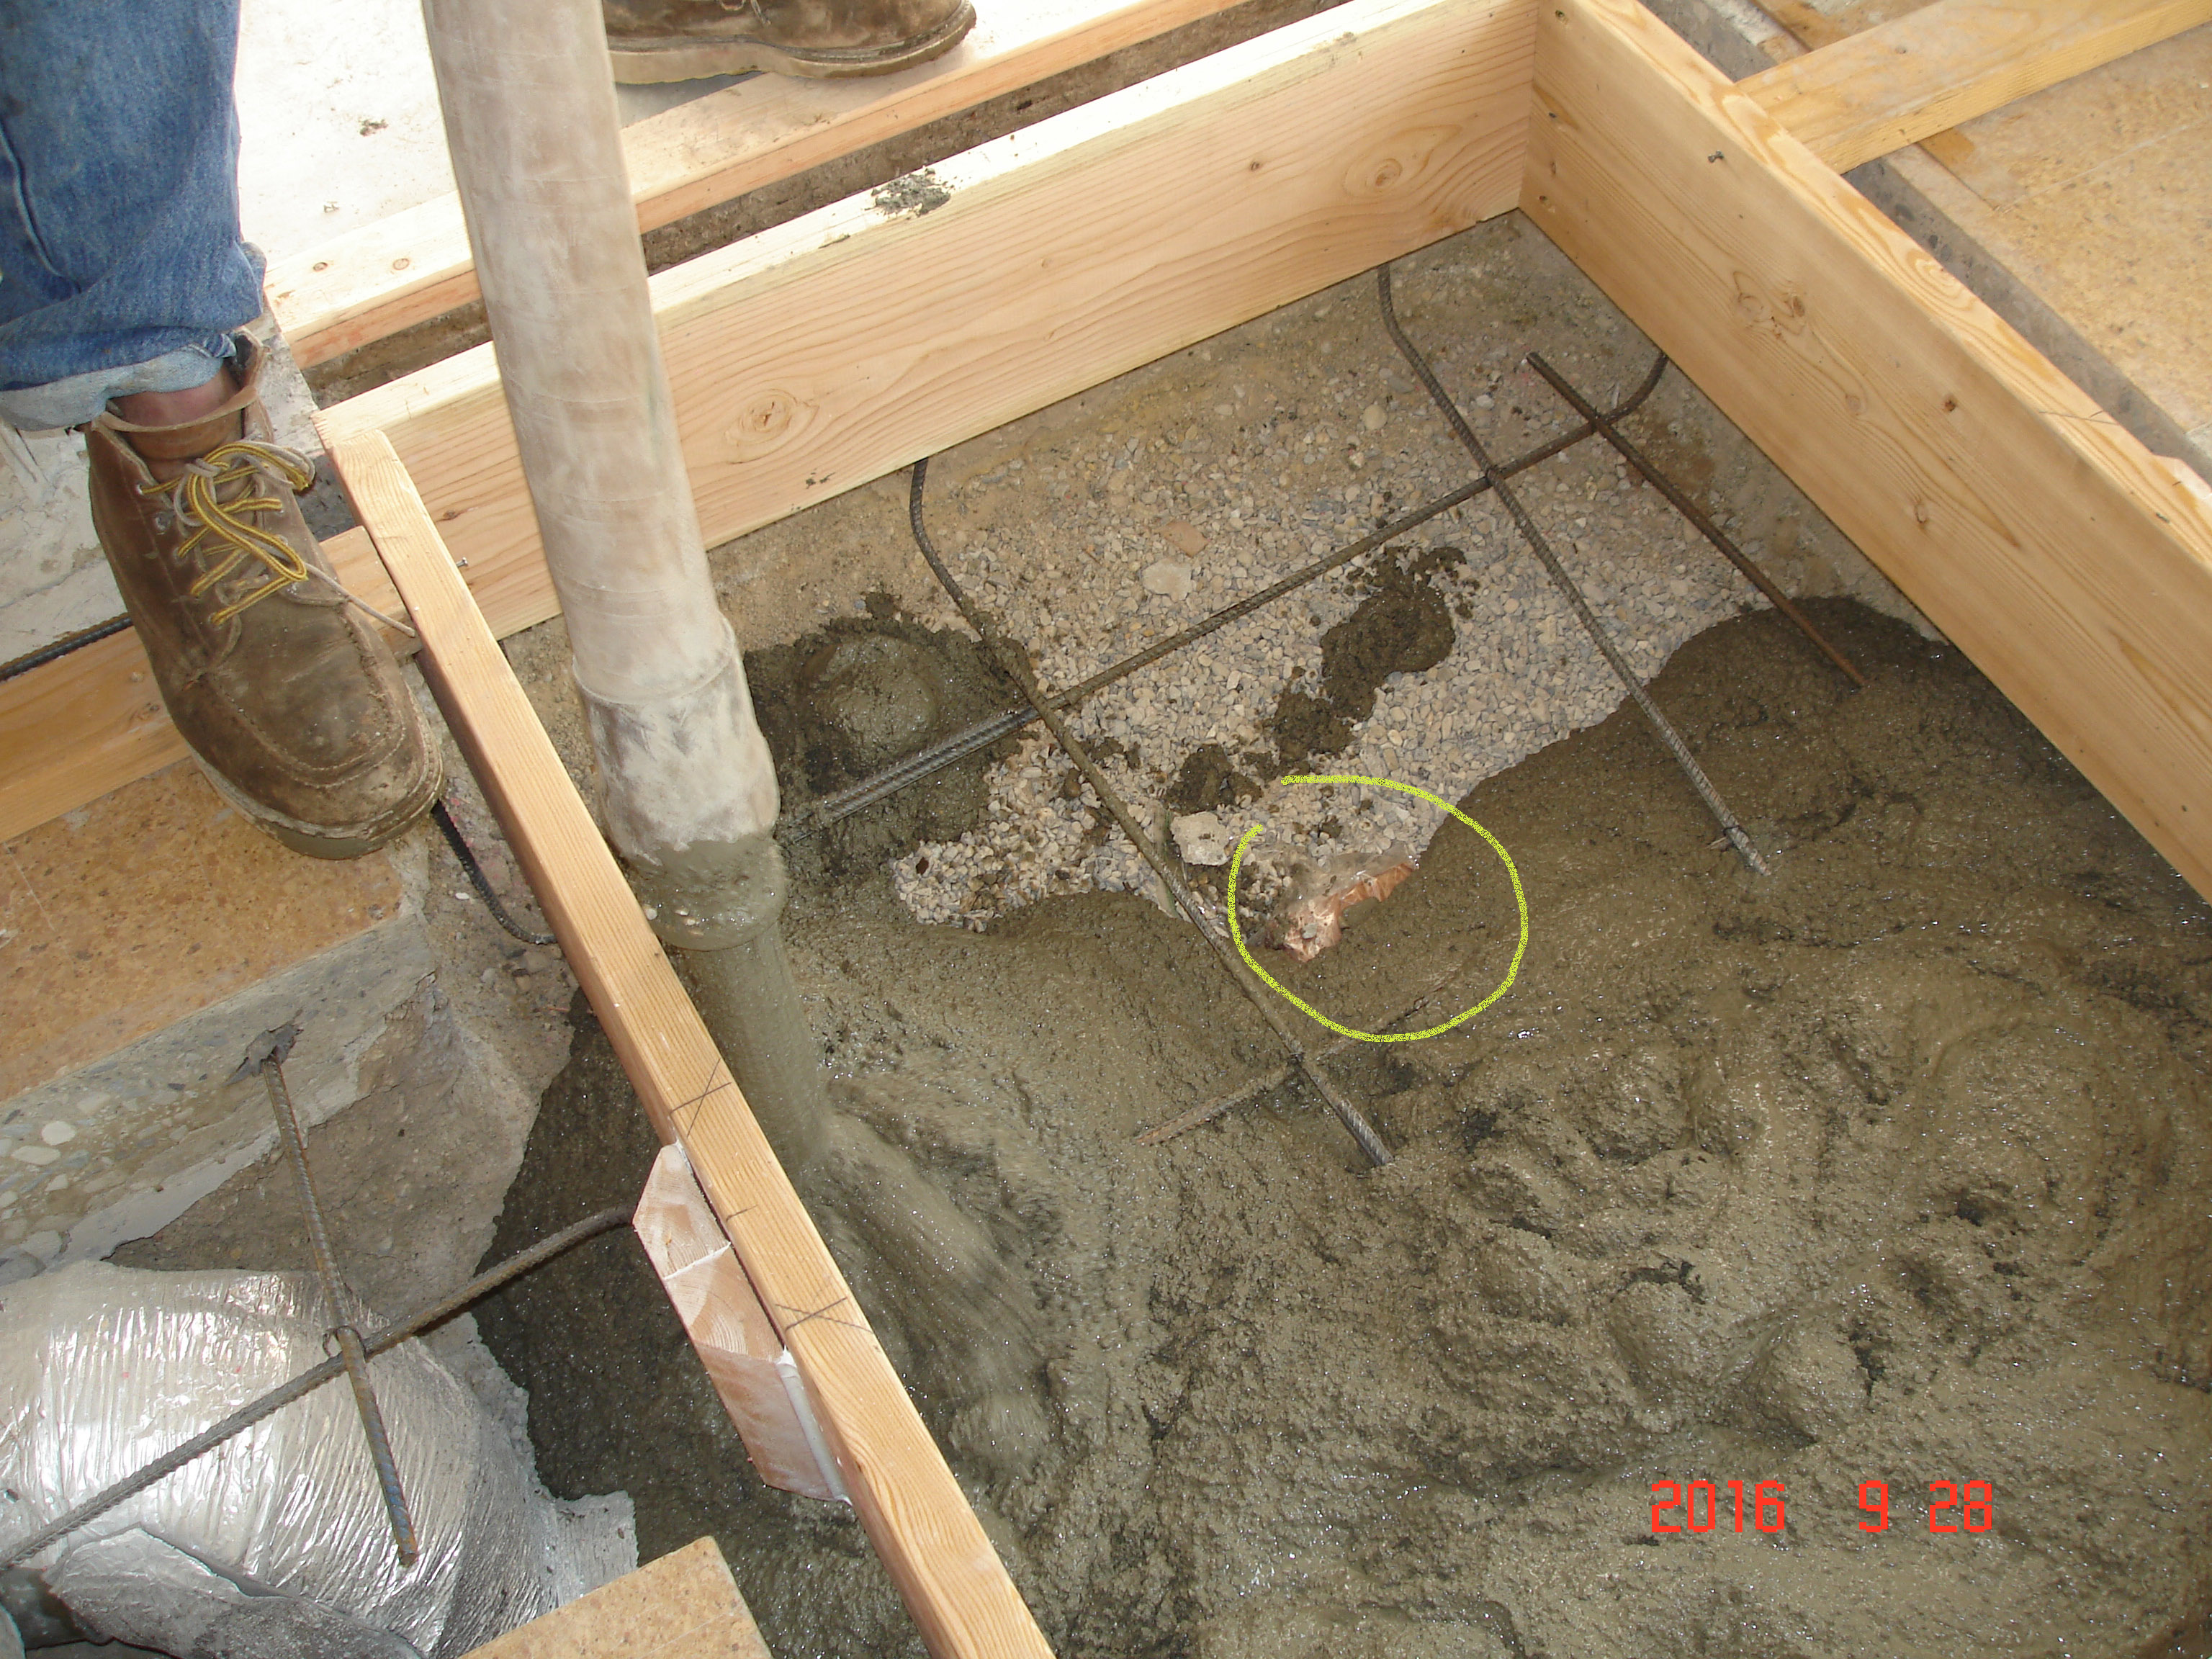
The pit's precursor:
an unpleasant surprise.
There's an
air duct underneath, for Christ's sake!
Damn.
We'd hoped that this wouldn't
happen. |
7
|
8
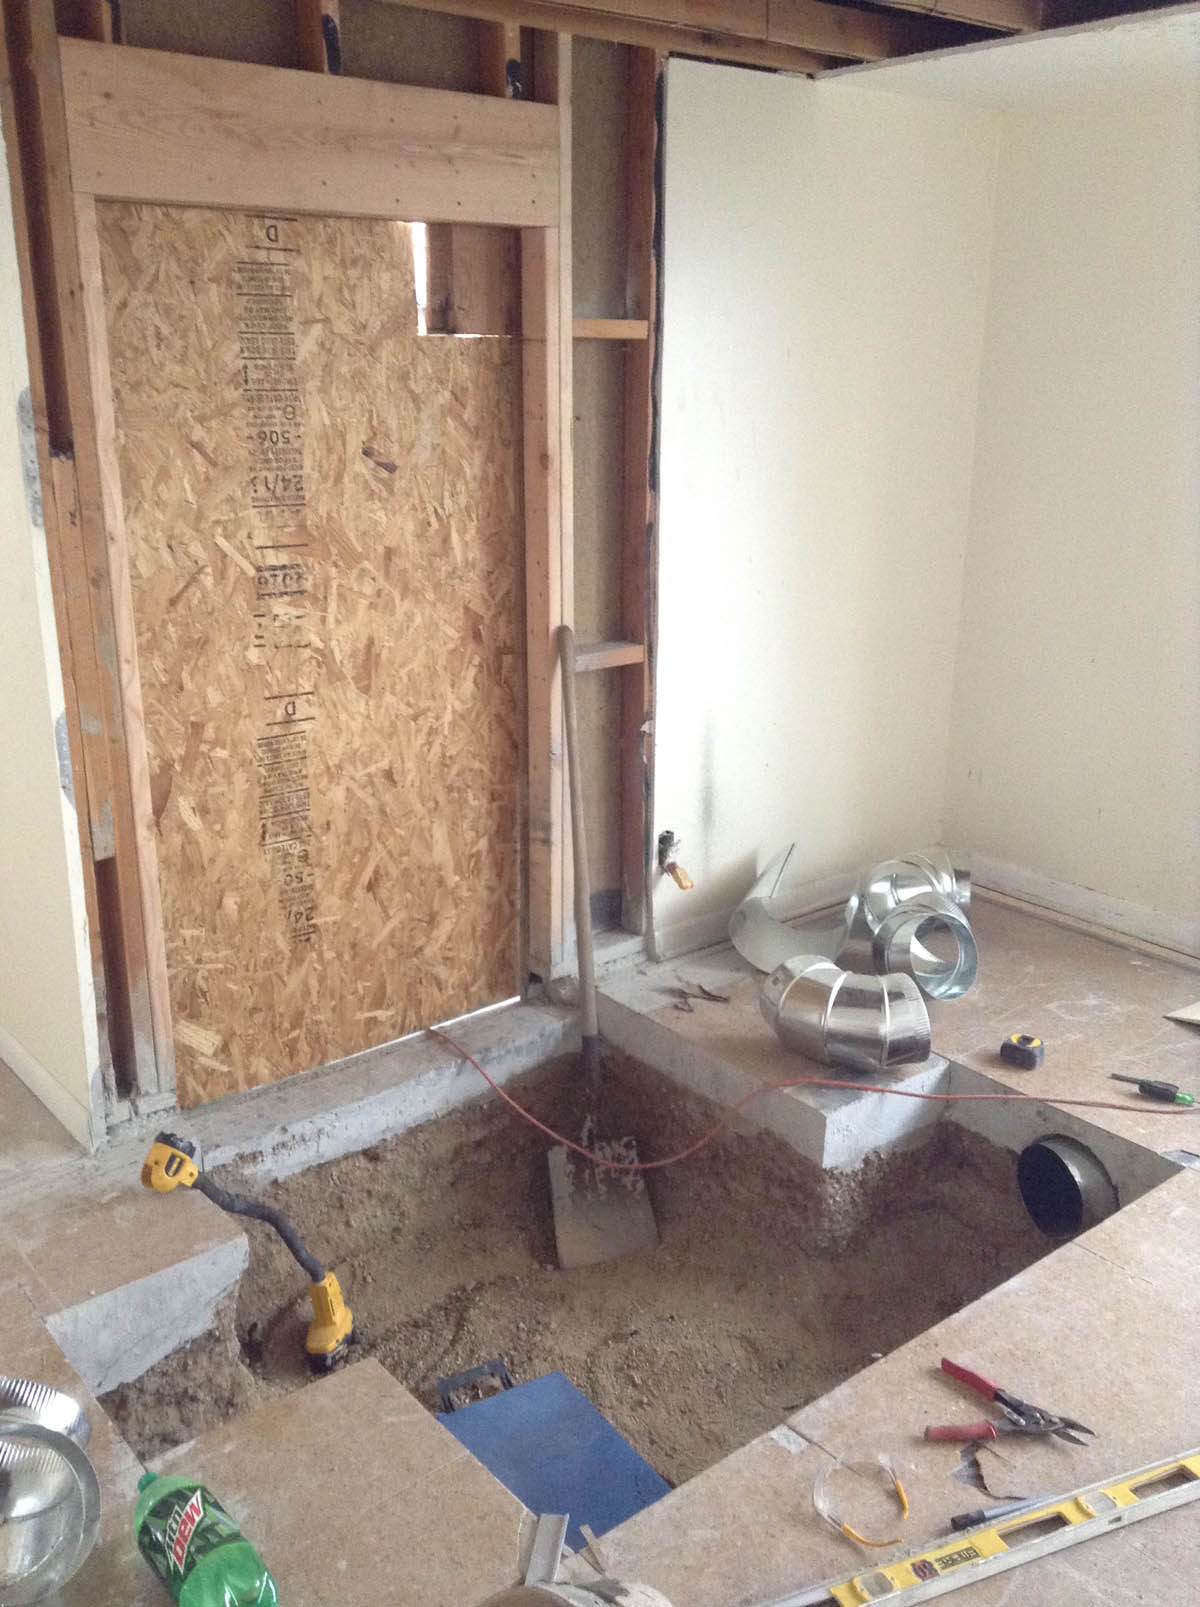
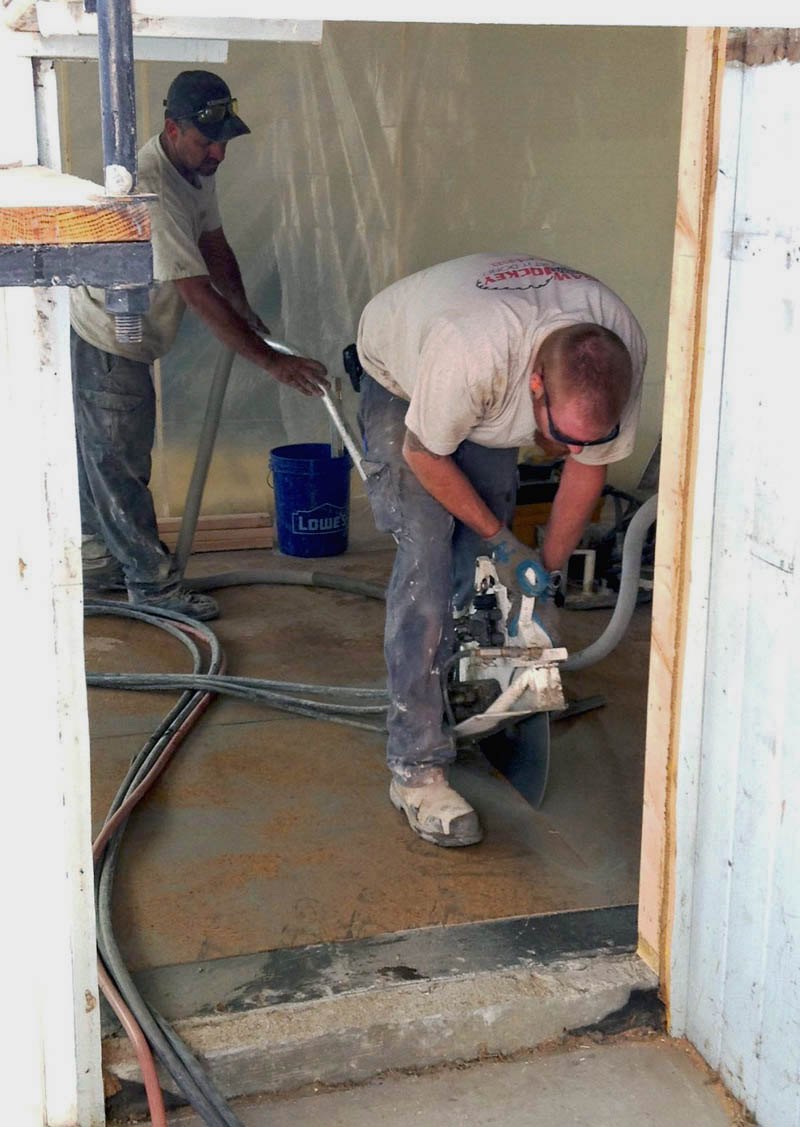
That air-duct needs to be taken care of. Daniel needs to go deeper
to re-route it. (Note that the door will have a "corner missing" on
top.
That's because of the stairs outside.) |
9
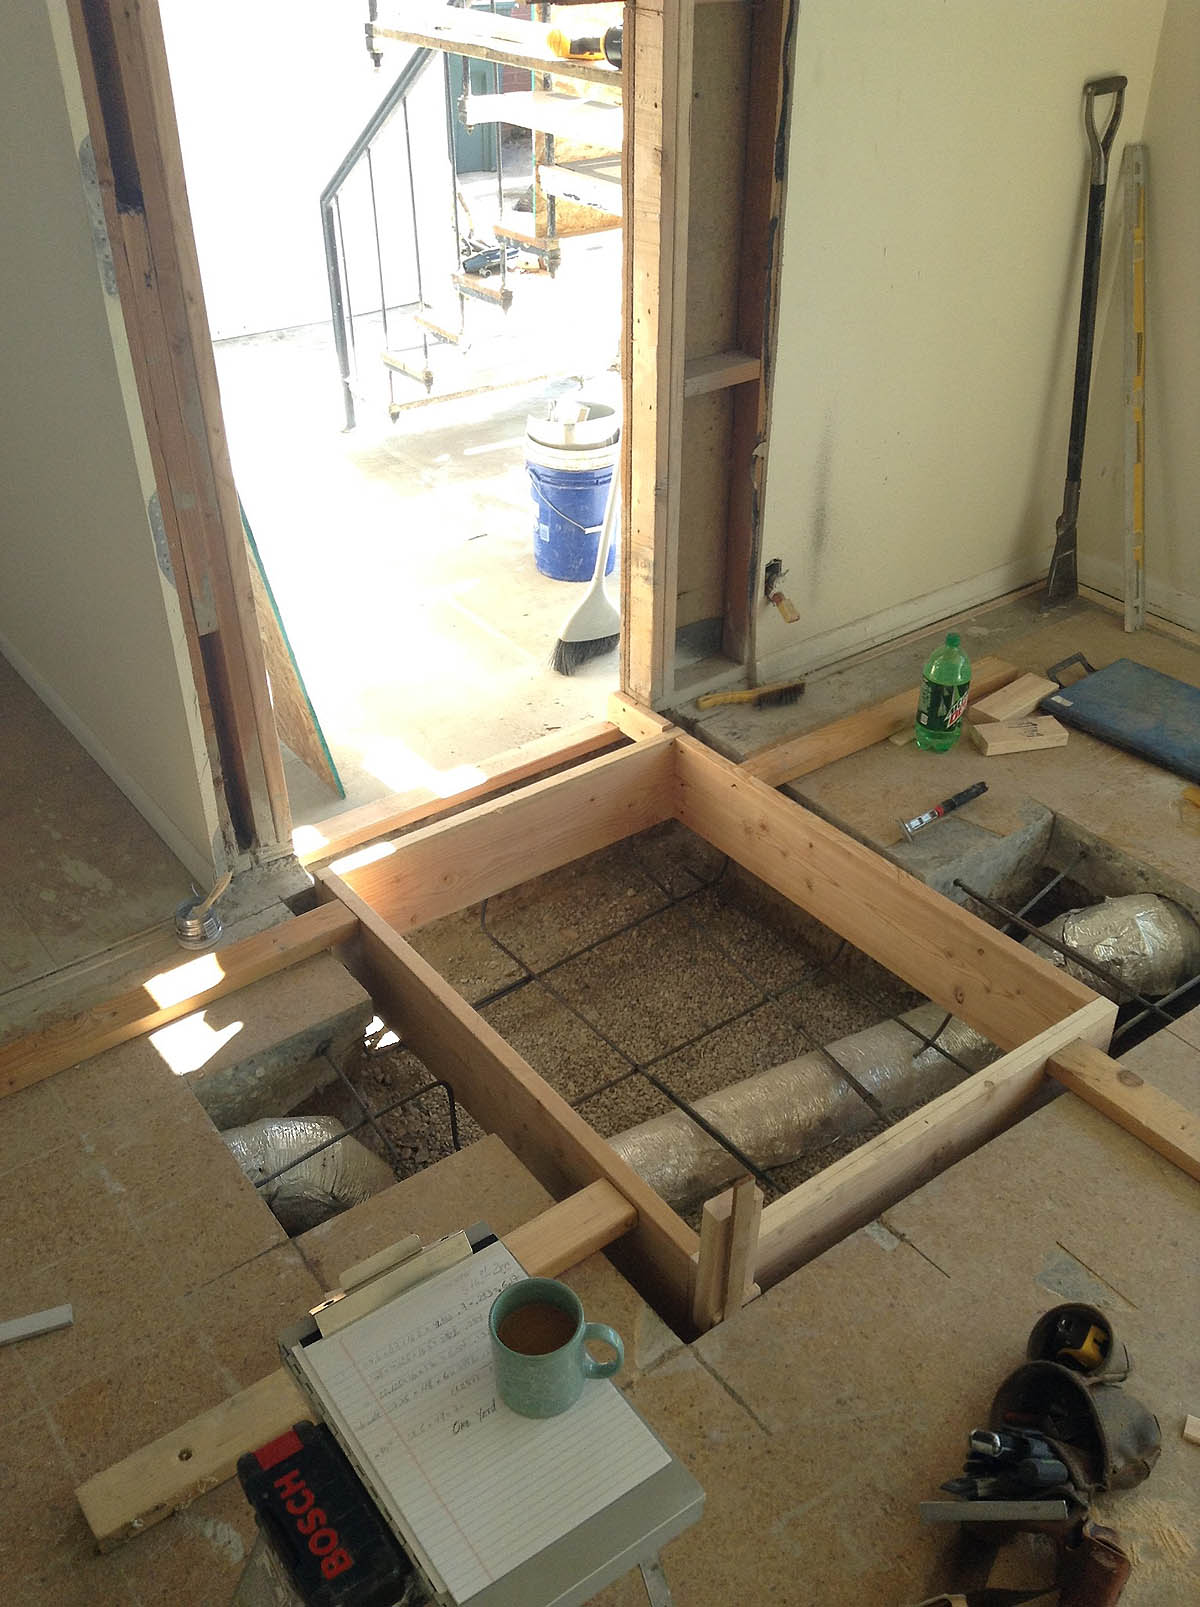
We're going deep to re-route that air-duct.
It looks like we'll need about one cubic yard of cement. |
|
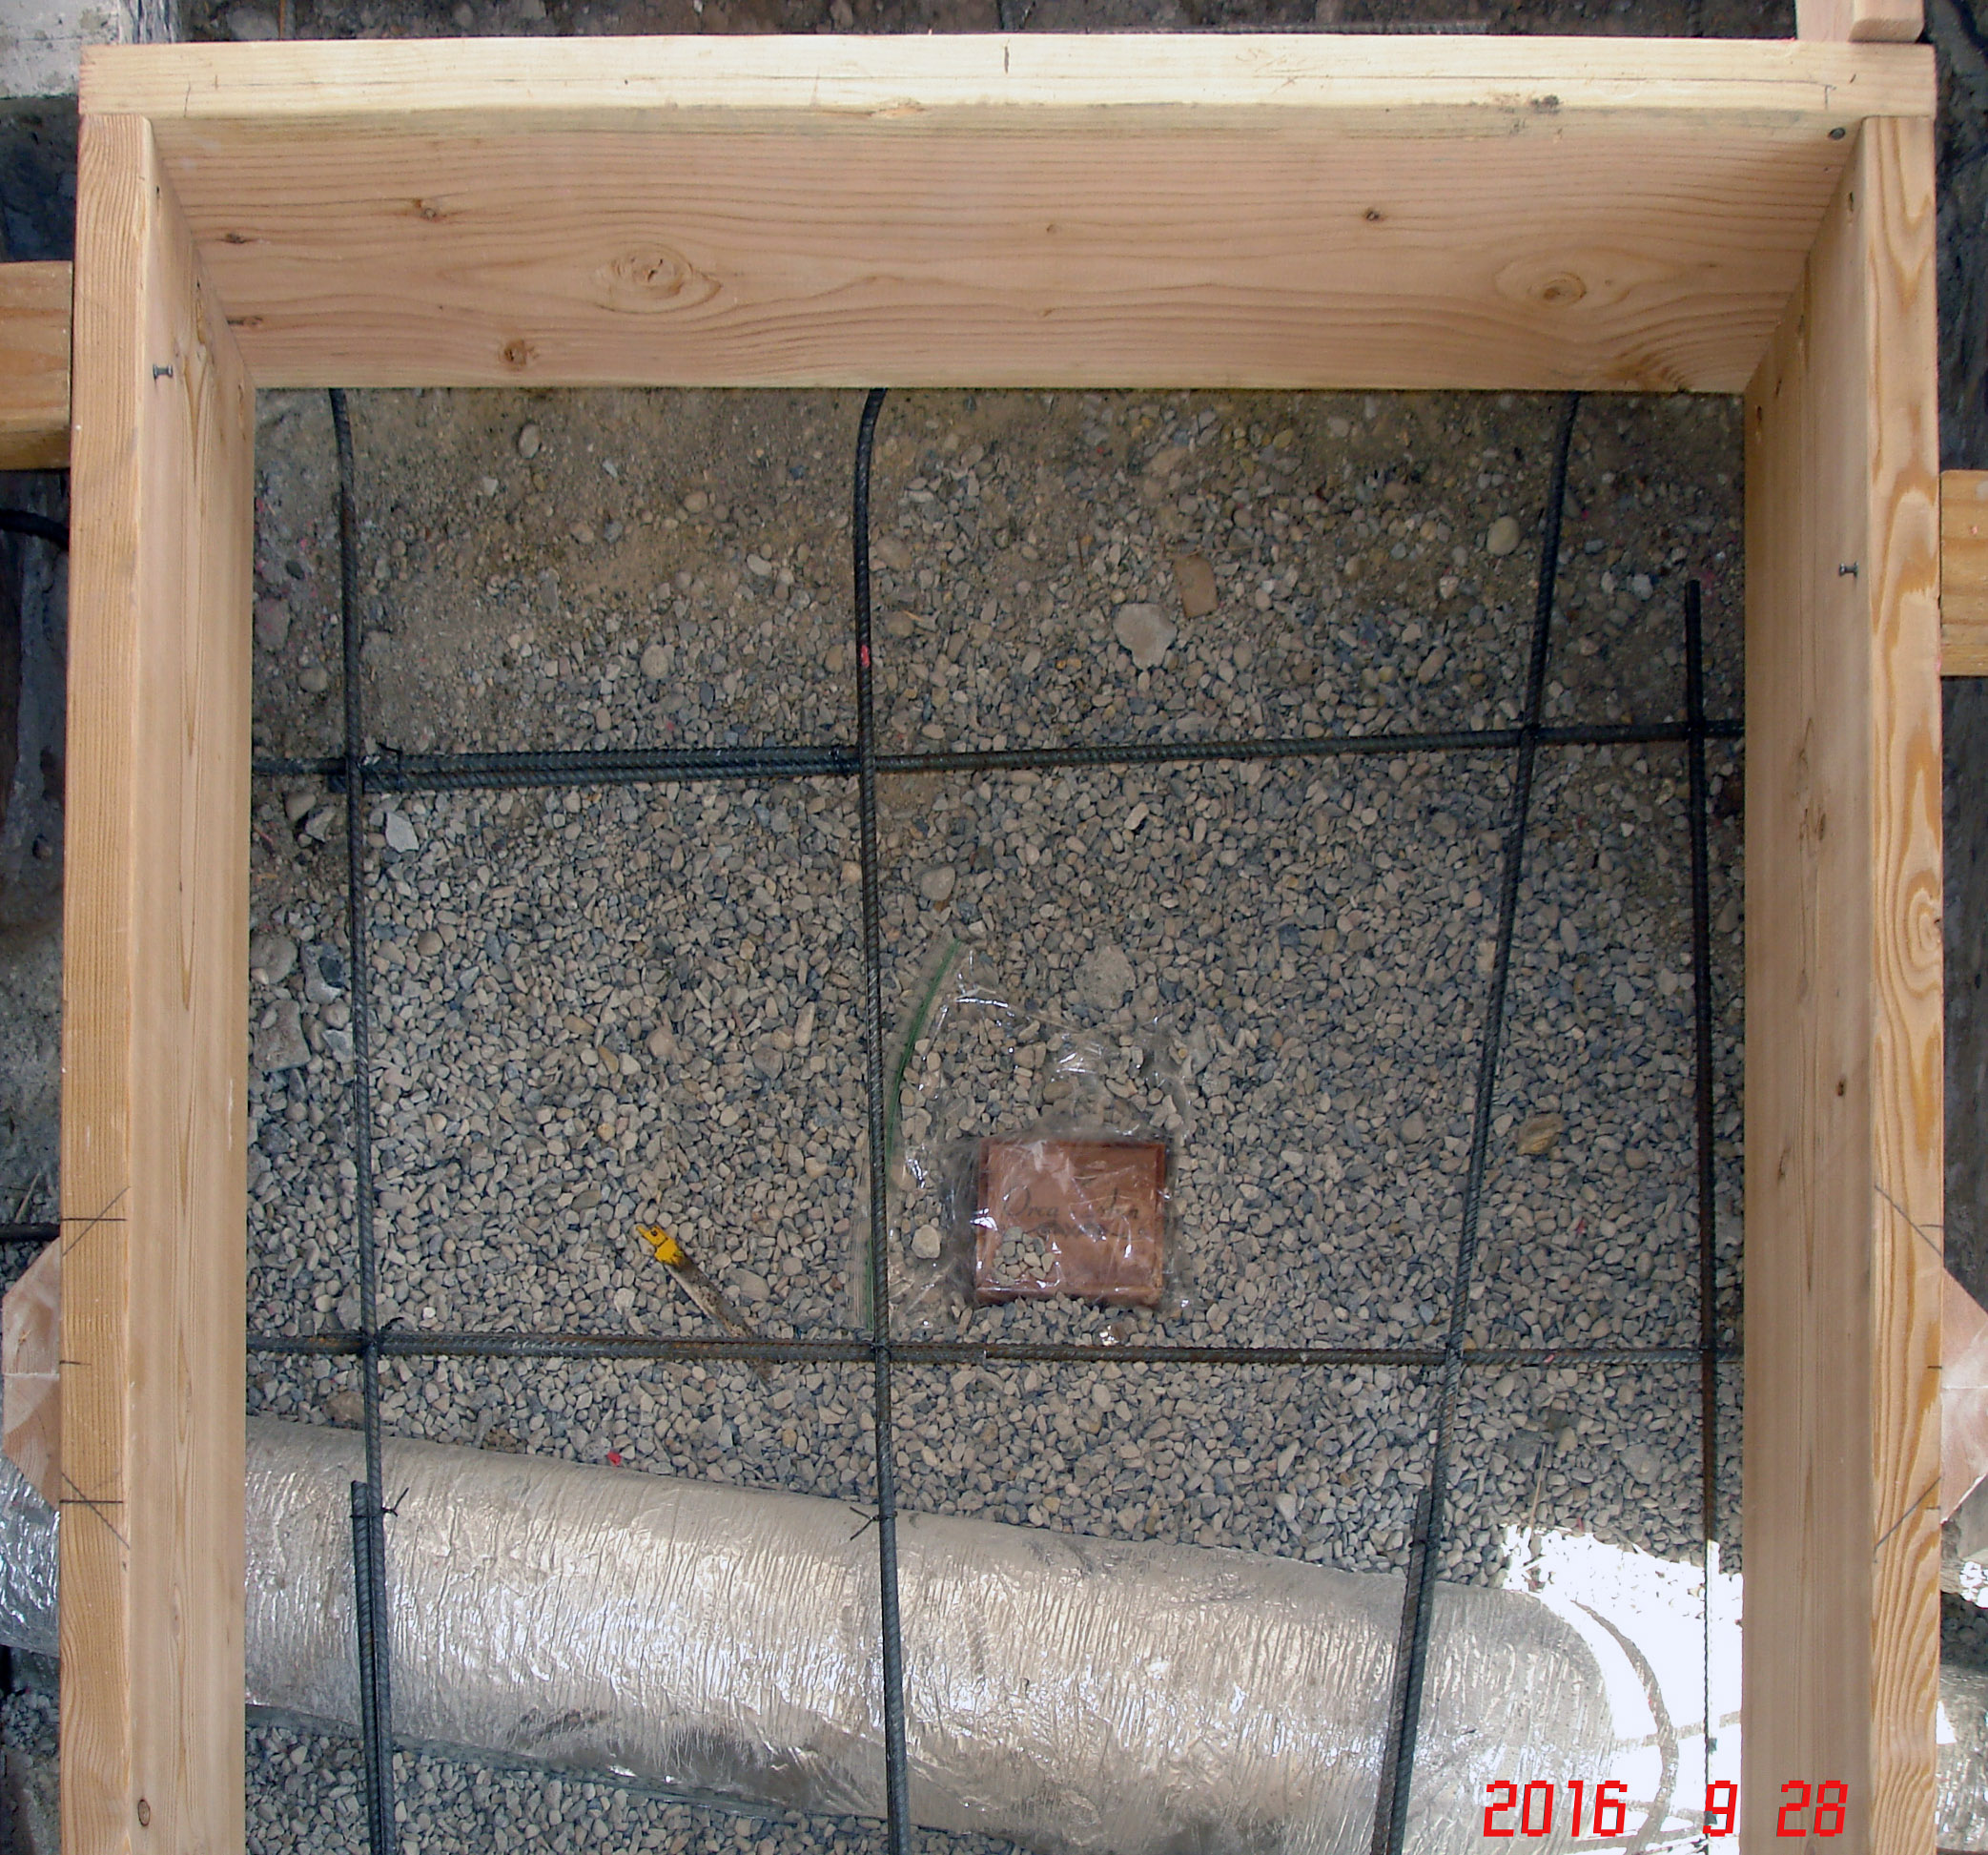
Orca~Ann (Jowles)
2000 - 2015
 |
|
1
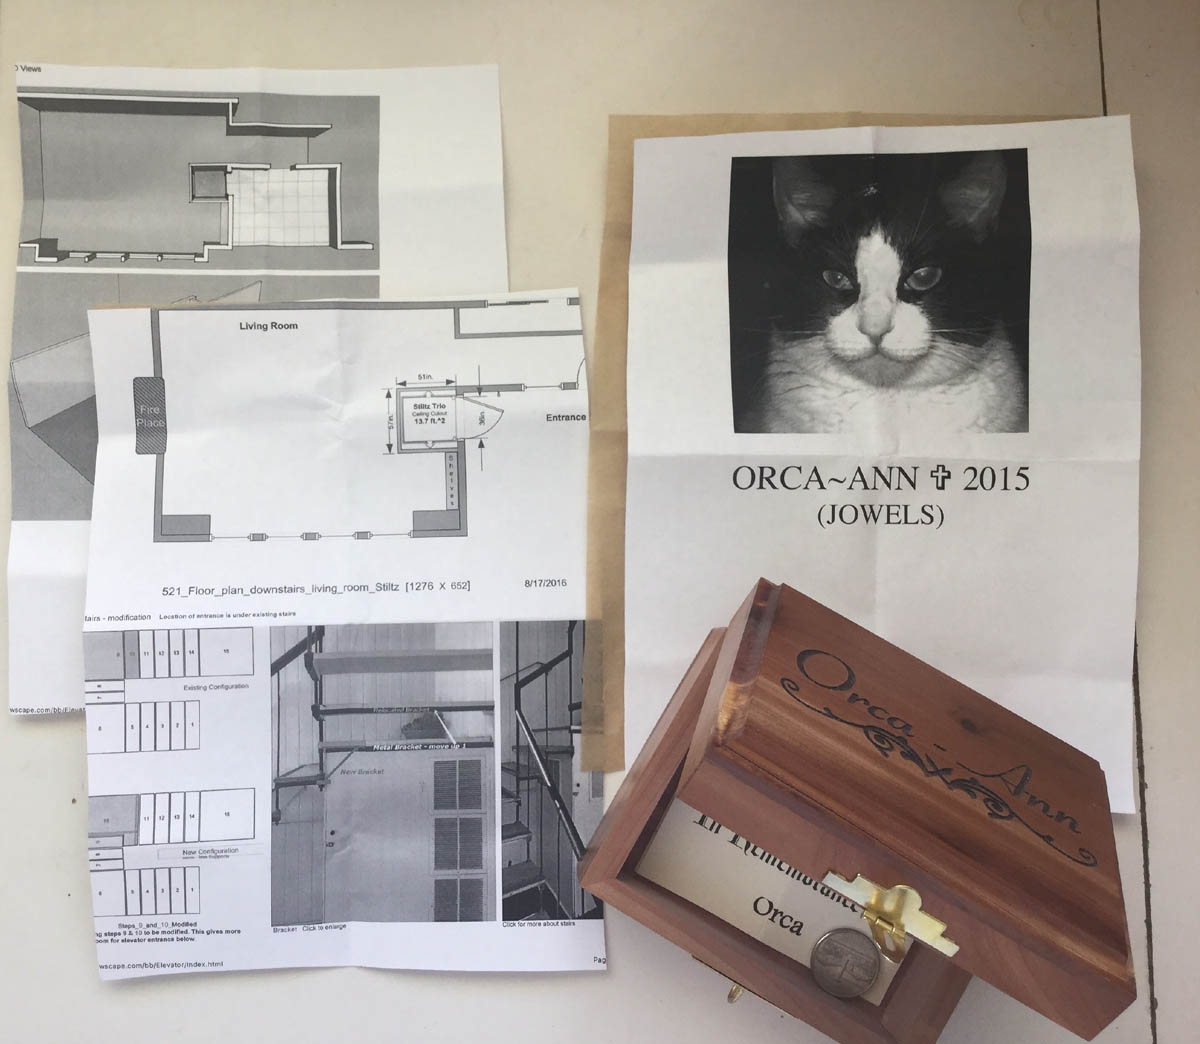
Orca~Ann (Jowles) wanted to be interred here.
I promised. This is the sarcophagus
for her
ashes.
|
2
 |
|
3
Orca going under... |
4

This will be the elevator's pit to allow level
entry. |
|
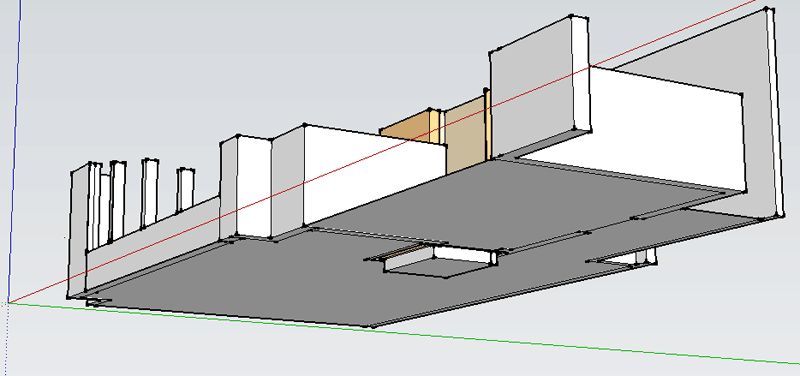
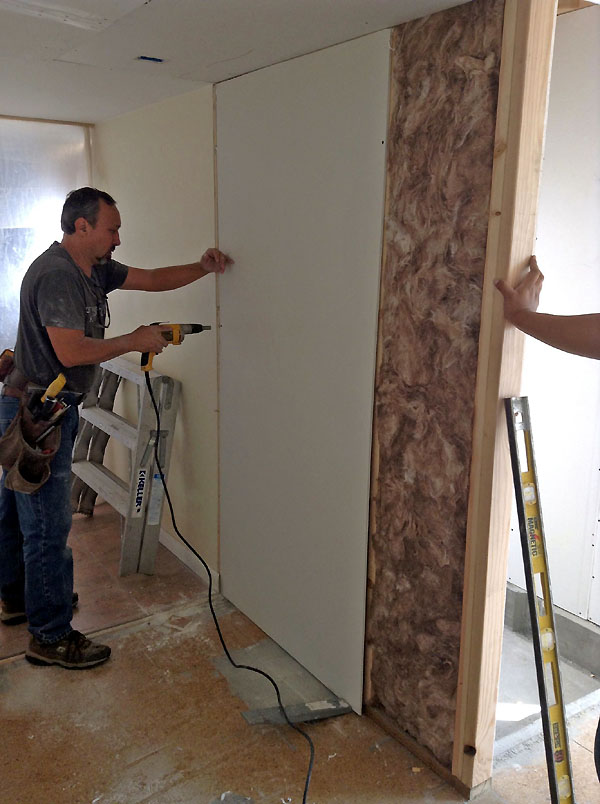
1
The woodwork -
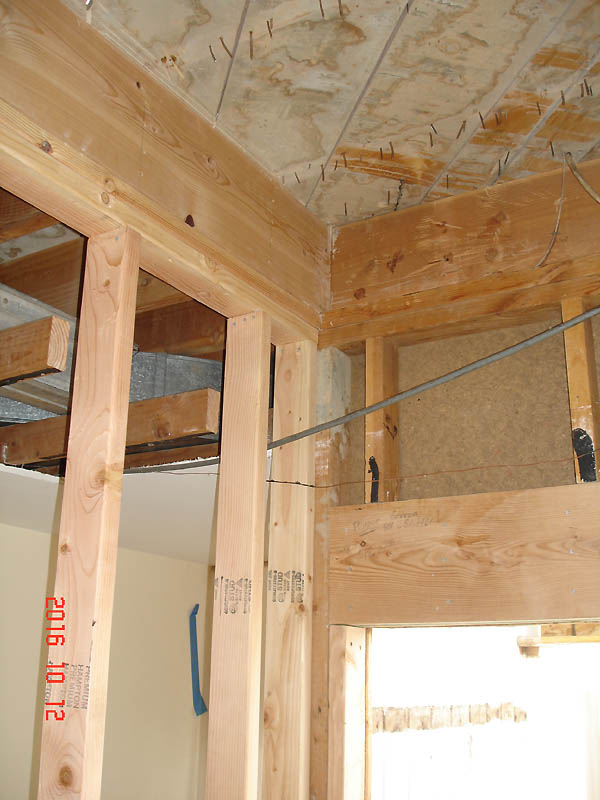 |
The woodwork -
Daniel Carpenter of
ESK Quality Remodeling LLC
designed and is now building an elevator shaft
downstairs.
This is what it looks like downstairs.
Two-by-tens are in place & the elevator entrance has been roughed out.
Two-by-fours for the shaft walls are in place now.
The ceiling (the upstairs floor) hasn't been opened yet; there are a lot of nails and screws in it). |
2016
10
17
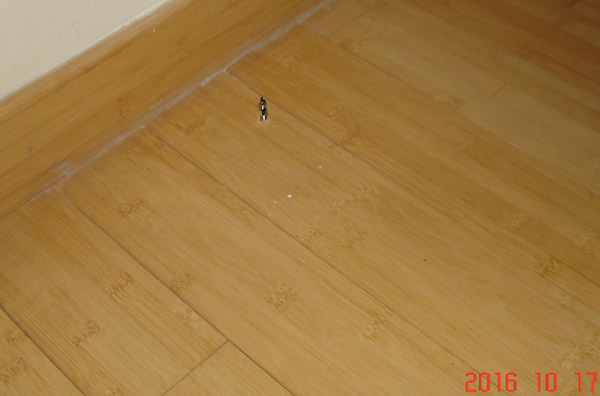
First Light!
This spot marks
one corner of where a hole is about to be
cut in the upstairs floor. Daniel Carpenter of
is drilling up from downstairs.
|
2
 |
|
3
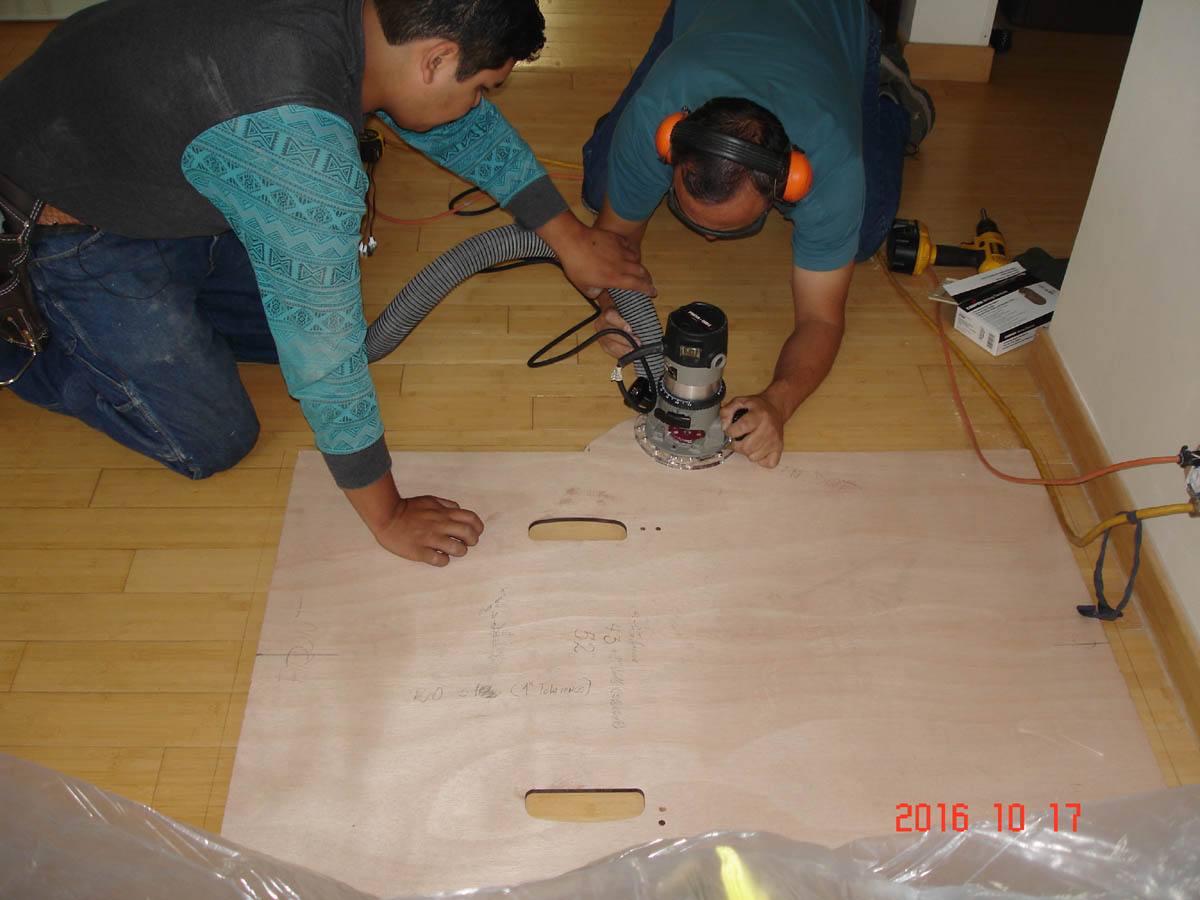
STILTZ provided a plywood template for the opening
through which the elevator will travel. Daniel uses it to cut a hole in
the upstairs floor. |
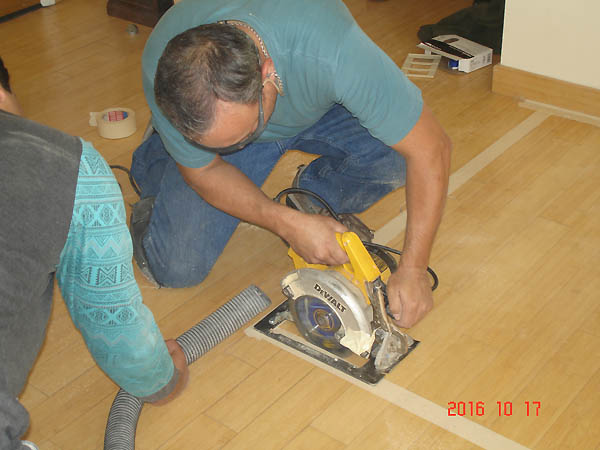
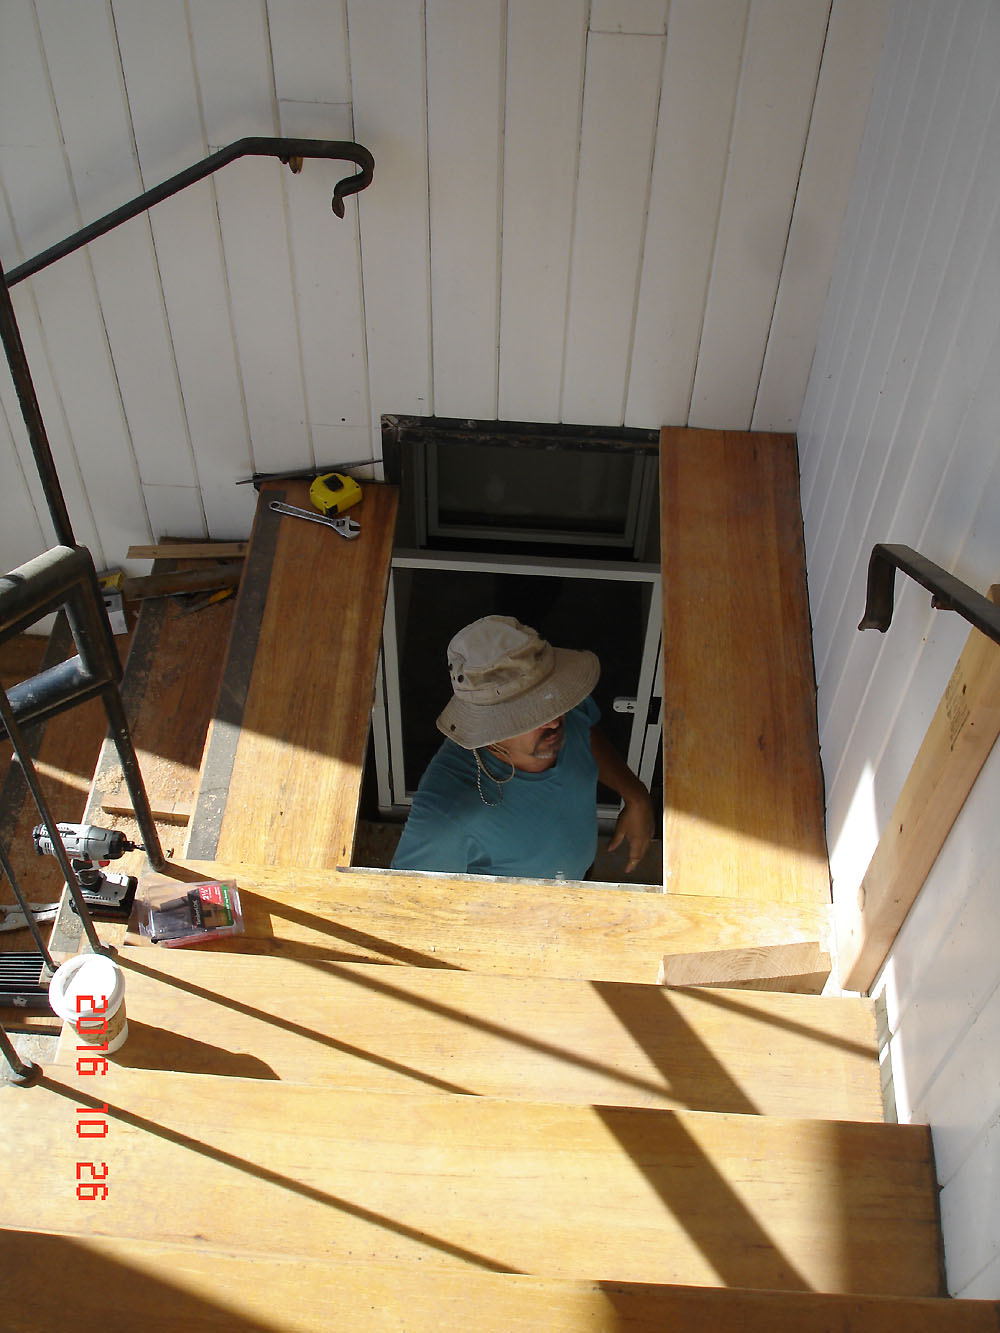
Daniel saws the opening for the elevator, upstairs.
Everything's gotta be measured just right!
Carlos catches the sawdust. |
|
4
 |
|
6
 |
5
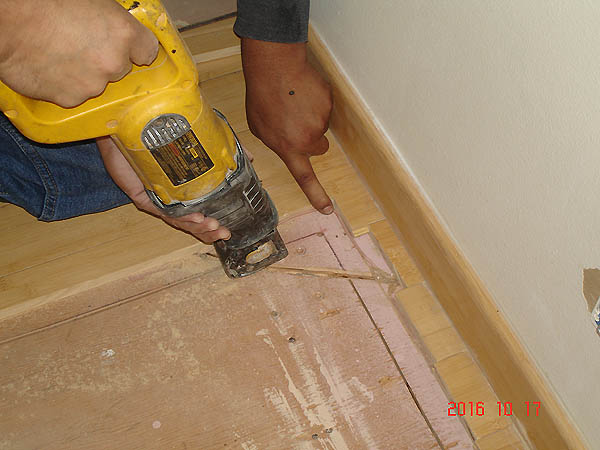
Daniel discovered a telephone cable under the bamboo floor!
It's held aside while he continues cutting corners of the hole. |
|
7
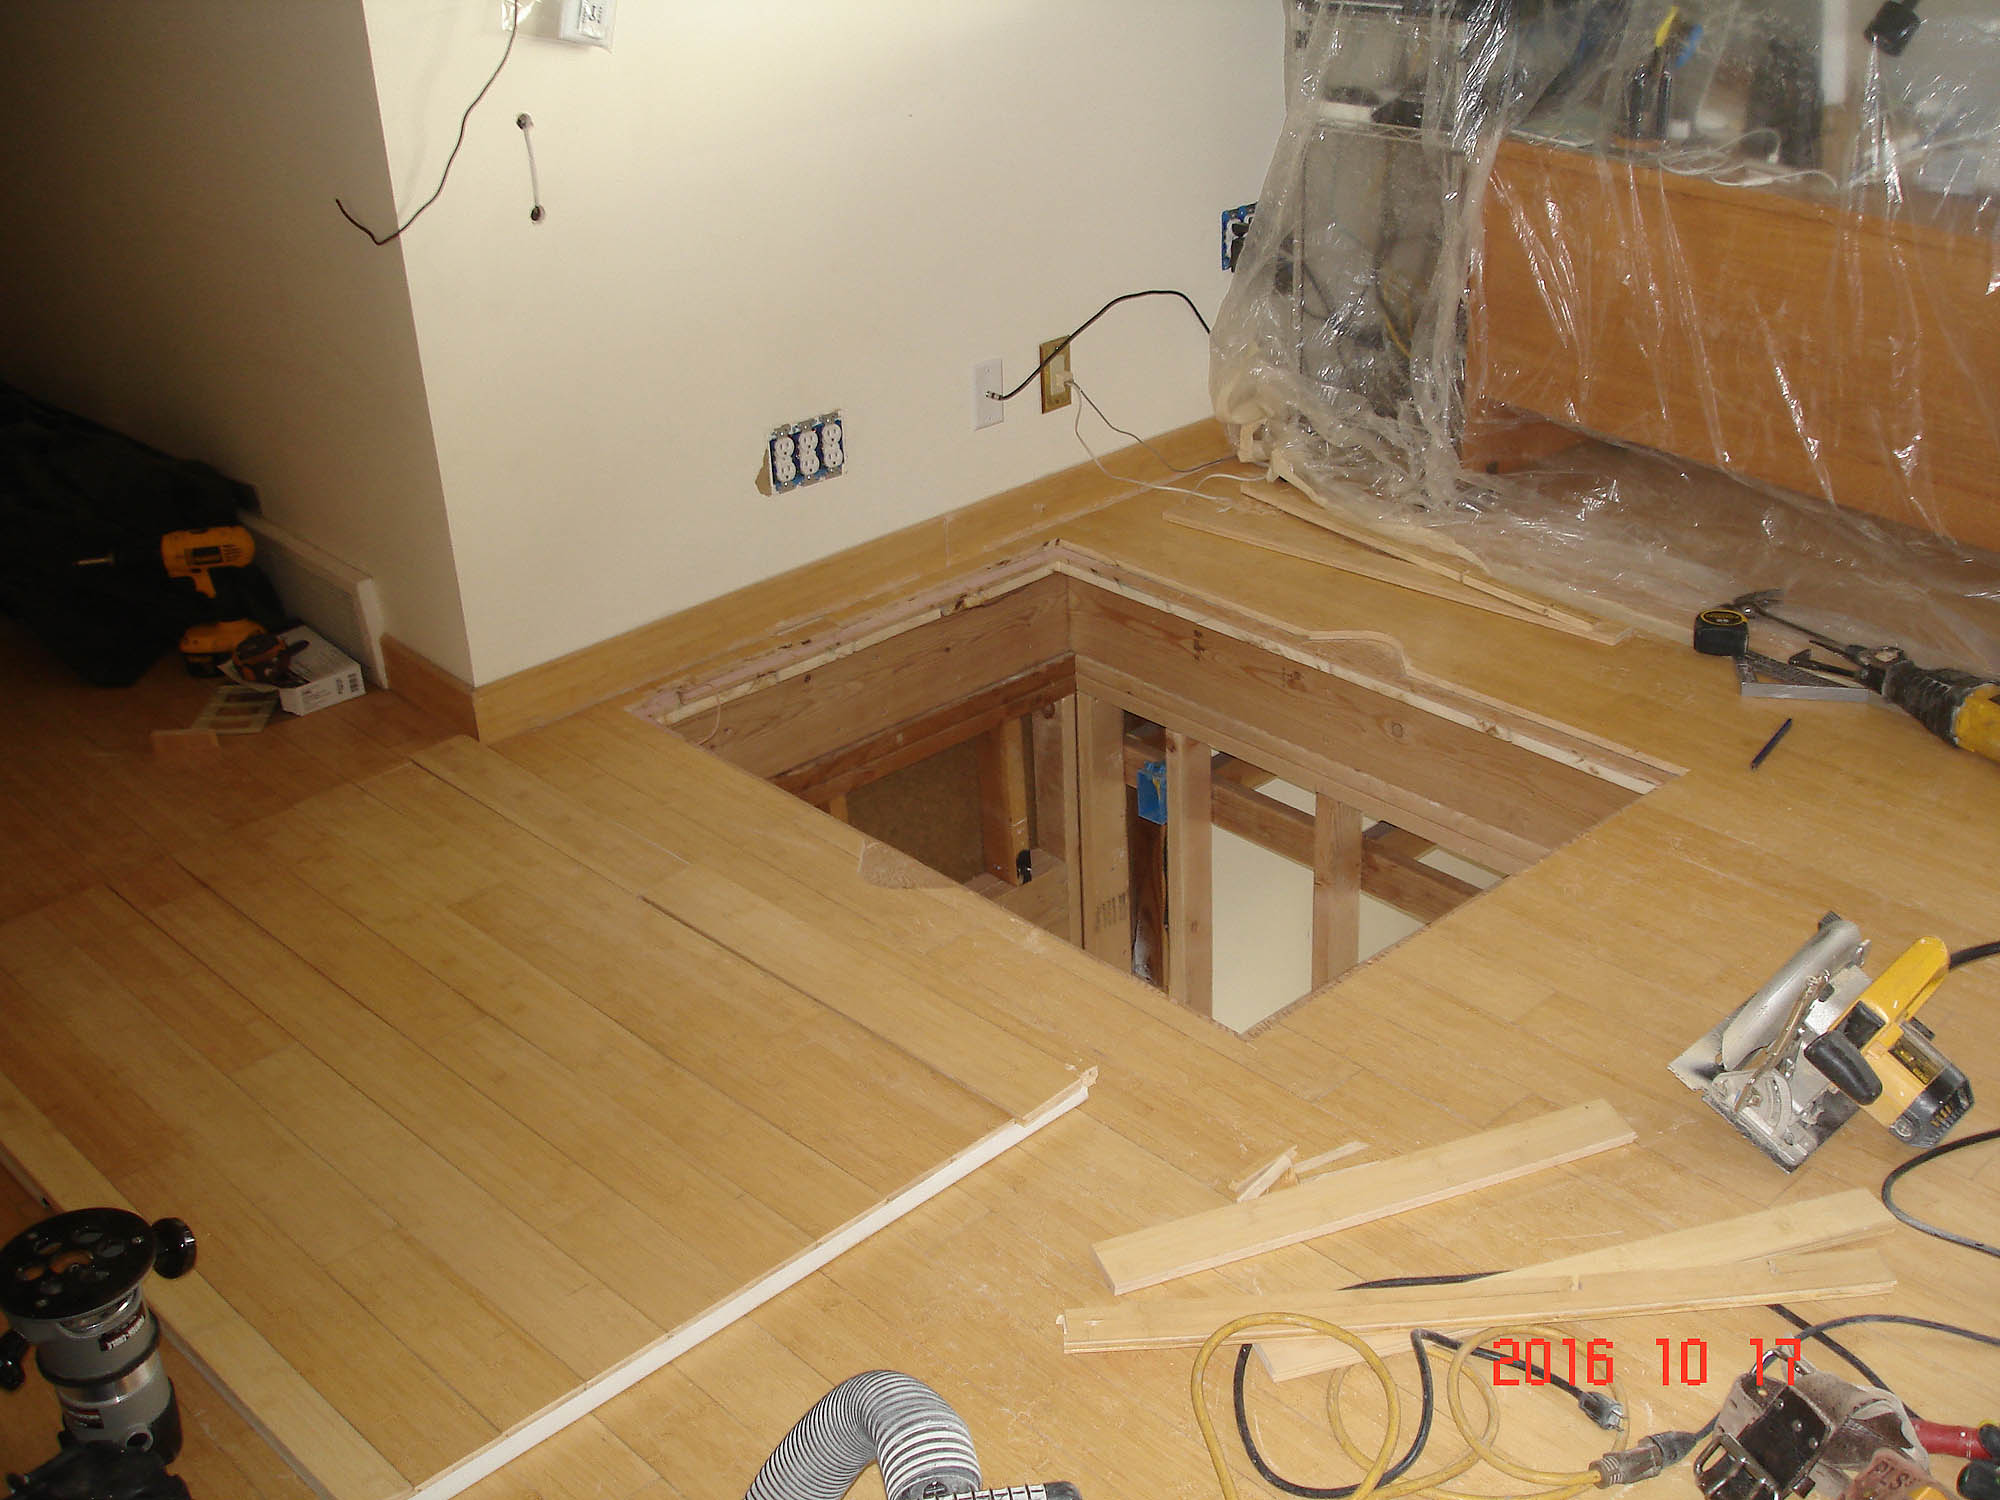
A hole is roughed out on the upstairs floor. Carlos
temporarily assembled the removed bamboo flooring (left) from the hole,
onto the STILTZ -provided traveling platform, which will later become
the top of the elevator - and it will become a part of the upstairs floor. |
8

Daniel and the kids are working
with the fellows from
Western Stair Lifts.
|
9
It's a family affair: Daniel
and the kids working hard...
|
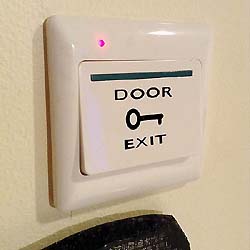
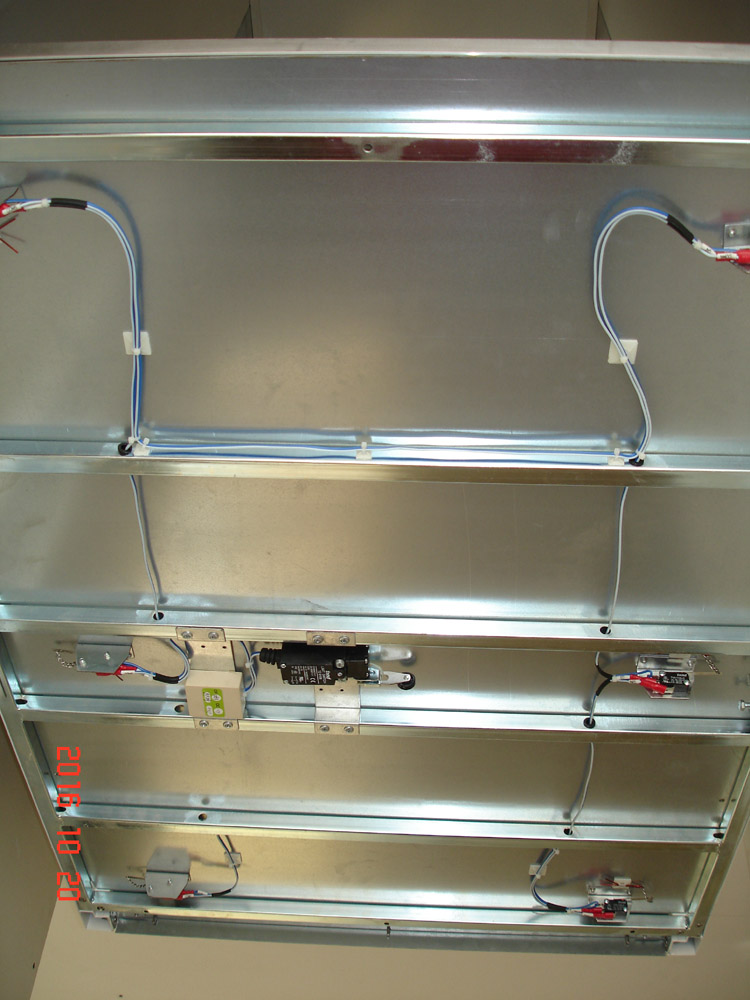
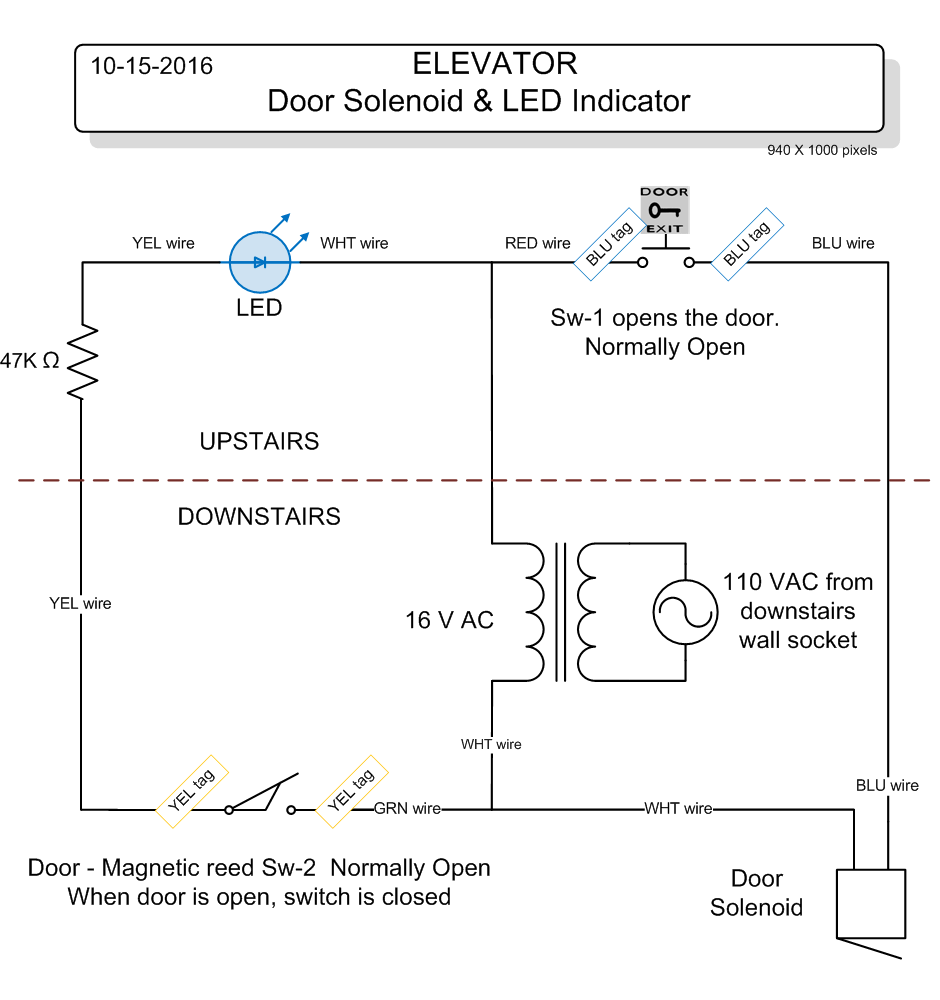 This circuit activates a buzzer to
open a door and turns on a light if the door is ajar. A
solenoid / buzzer opens the downstairs outside door. It's activated by
Sw-1, upstairs. A magnetic reed switch, Sw-2, illuminates an LED upstairs
if the downstairs outside door is open.
Link
Make your own
GARAGE DOOR INDICATOR LIGHT
- No transformer!
|
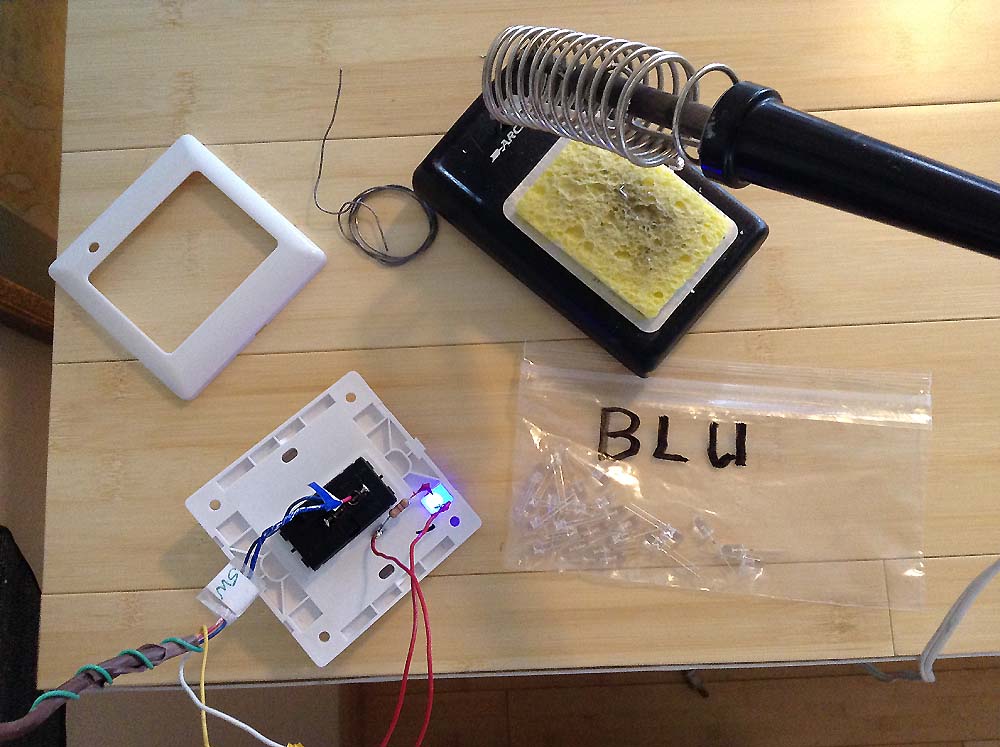
A blue LED - added to the housing of the switch that opens the door.

The blue LED was mounted
inside the switch housing; it illuminates when
the downstairs door is left open. (Sw-2
in the diagram.)
|
|
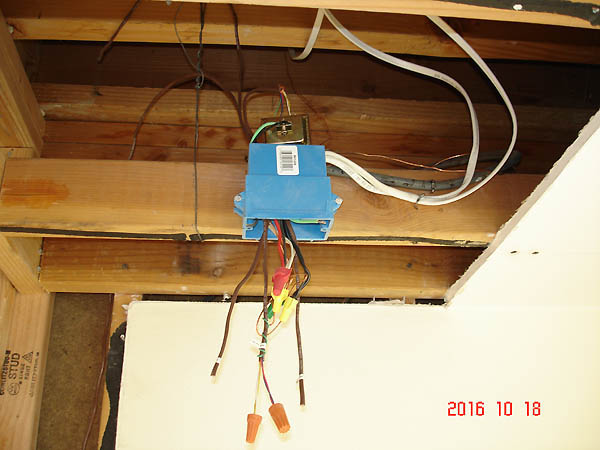
A junction box in the ceiling (downstairs)
where all the wiring comes together. |
 |
Upstairs, Sw-1 can buzz the door open.
(A red LED wasn't visible during
the day but it was pretty at night.)
Downstairs, A magnetic reed Sw-2, illuminates the blue LED
when the door is not closed. |
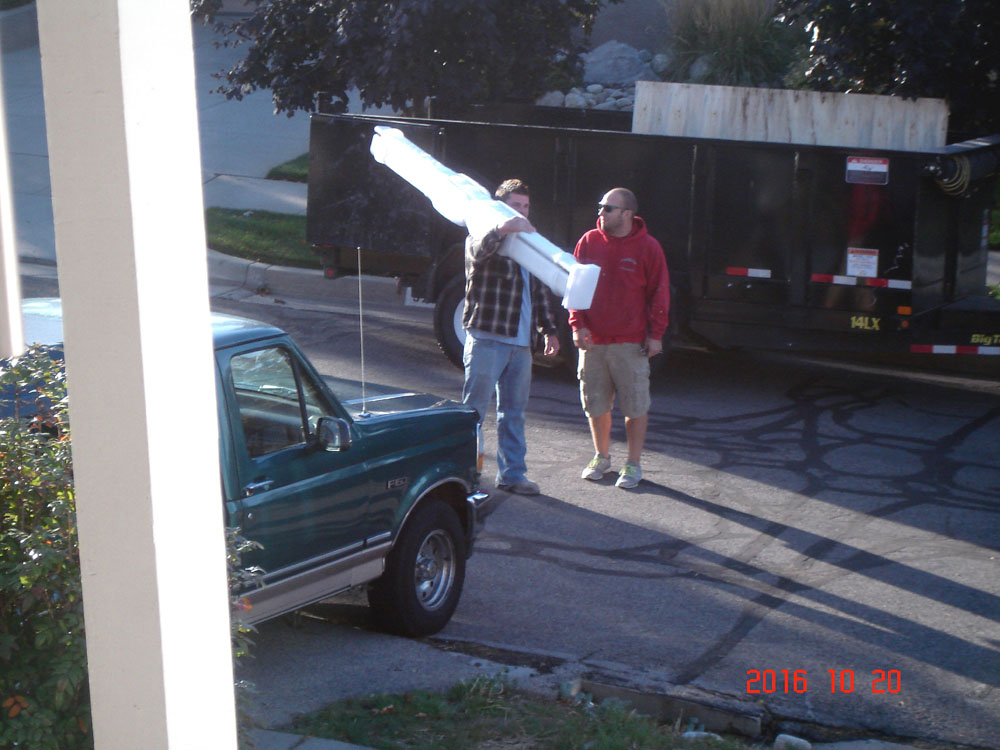
2016
10
19
It's time for the
drywall today! Tomorrow Stiltz and
Western Stair Lifts will arrive to install the elevator.
|
|
 |
The pit has its braces removed; it's
ready for the elevator tomorrow.
Note, at left and right, the
indentations for the elevator support beams.
Daniel applies sheet rock to the elevator shaft. It's insulated. |
2016
10
20 The day of
the installation.
Henk van den Ende of
Stiltz came and so did some
people form
Western Stair Lifts - |
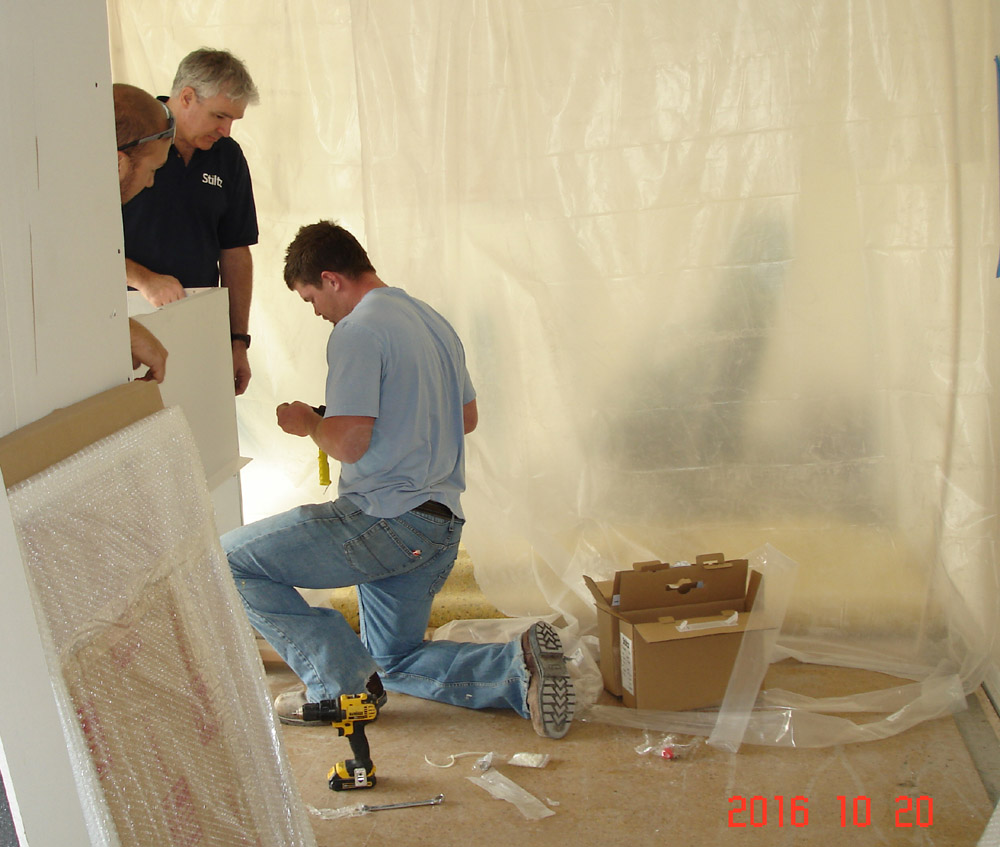
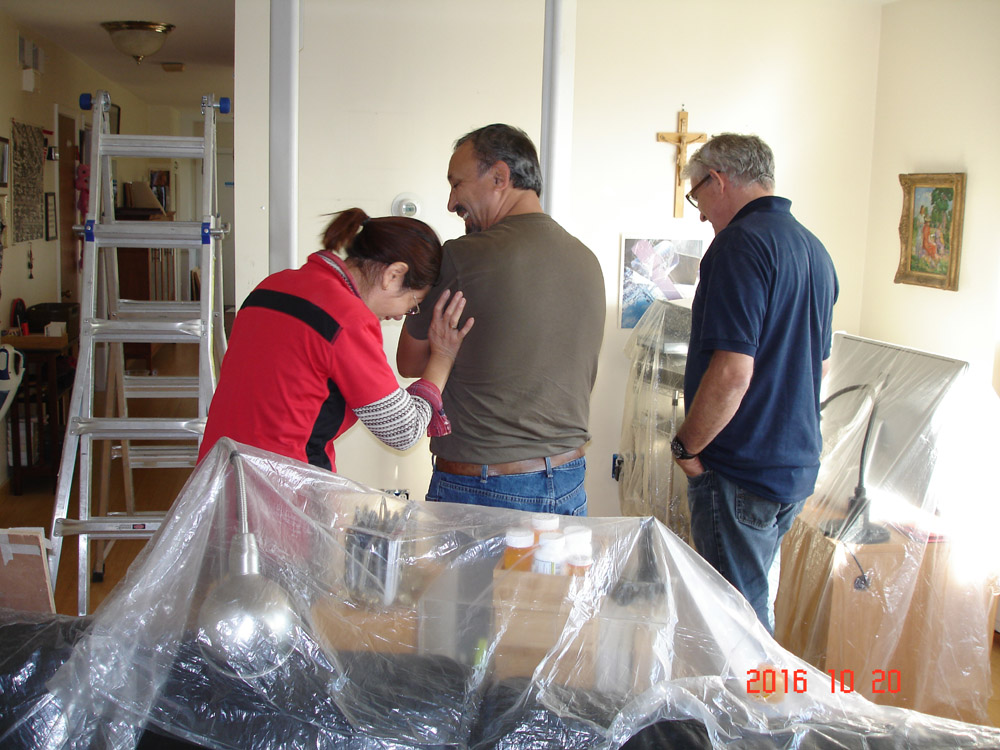
1
 |
The day of the Installation, the
workers arrived bright and early AM. First they unloaded the support
pillars of the elevators. The fellow in the red jacket is Preston
Hill of
Western Stair Lifts. |
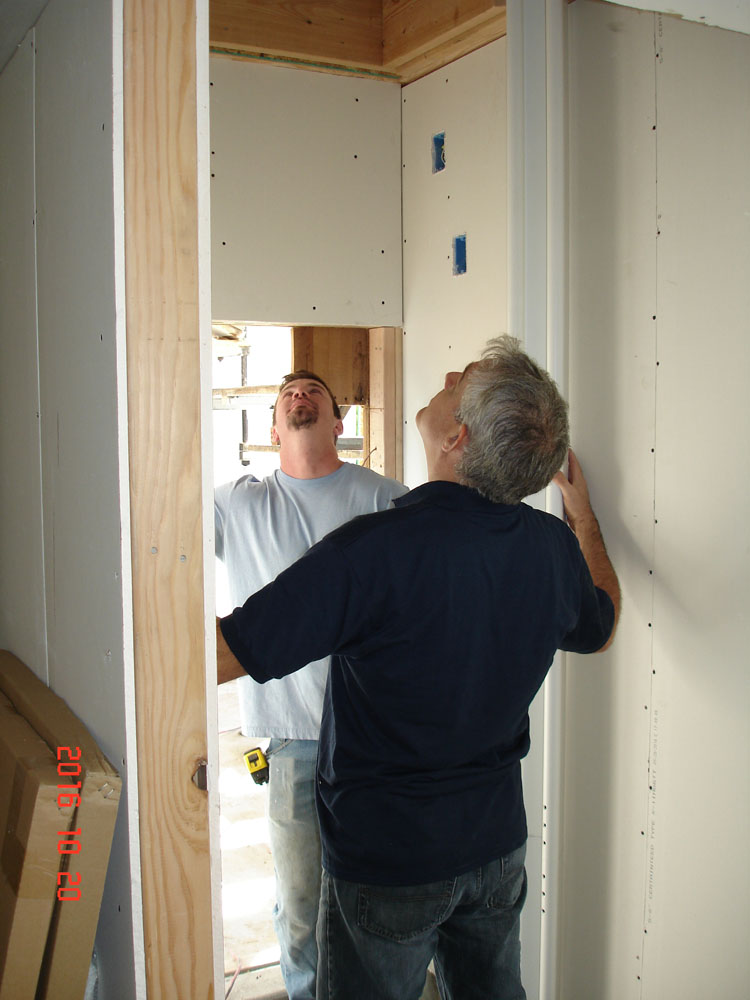
2
Upstairs, a hole is awaiting. Daniel Carpenter of
ESK Remodeling
made that and all the other things.
Link
\ ESK
also made this bathroom. |
3
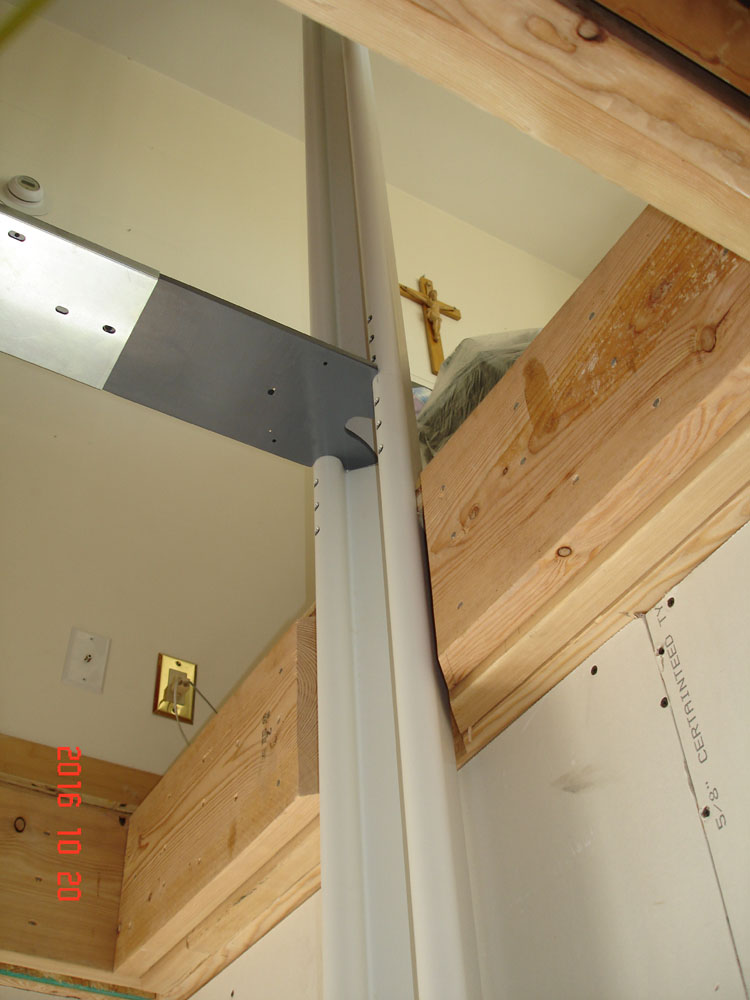
The hole from below. The 2x10s support the elevator
lid. There's a
temporary spacer to assure that the support beams are at
the right
distance form each other. Jesus looks on from above,
thank god. |
4
Looking up the elevator shaft. |
5
Looking down from upstairs. |
6
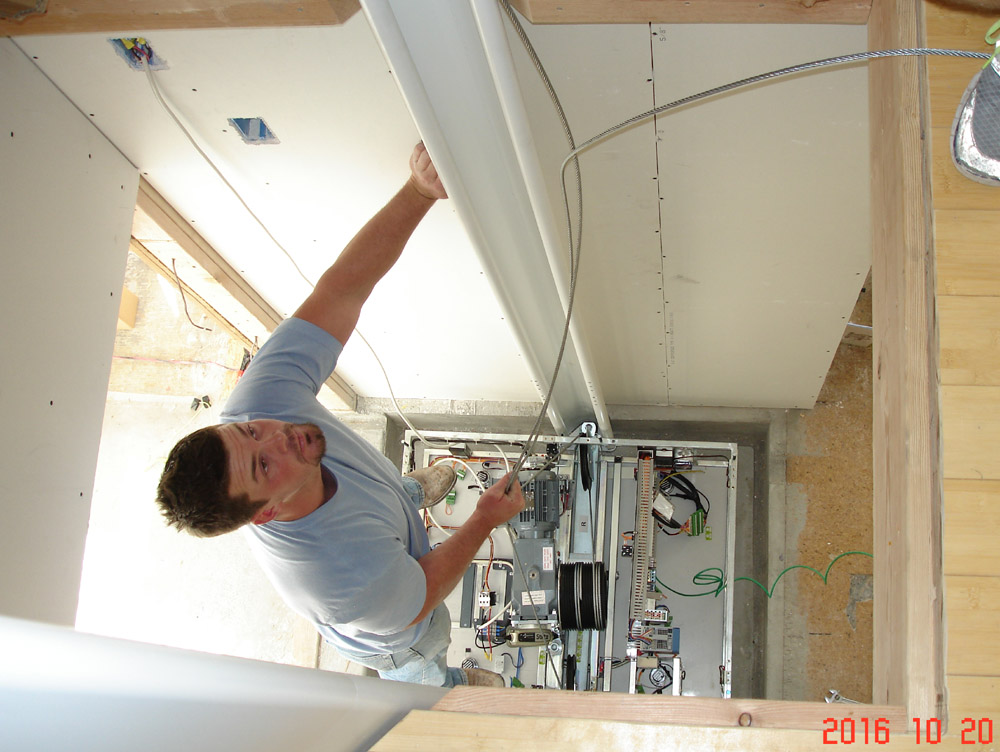
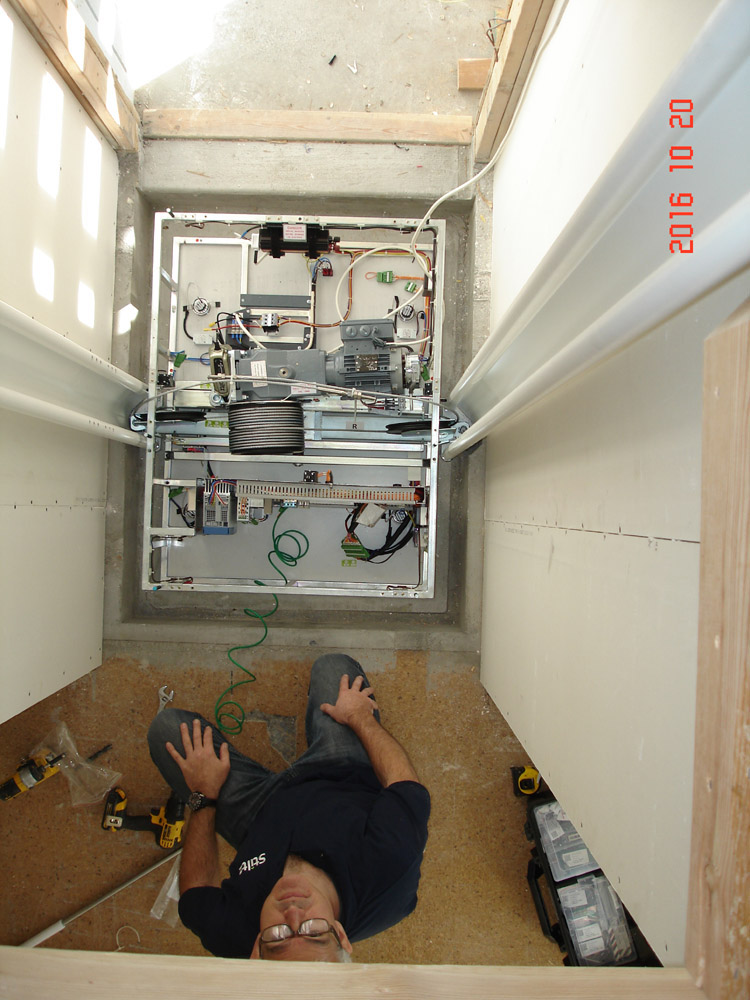
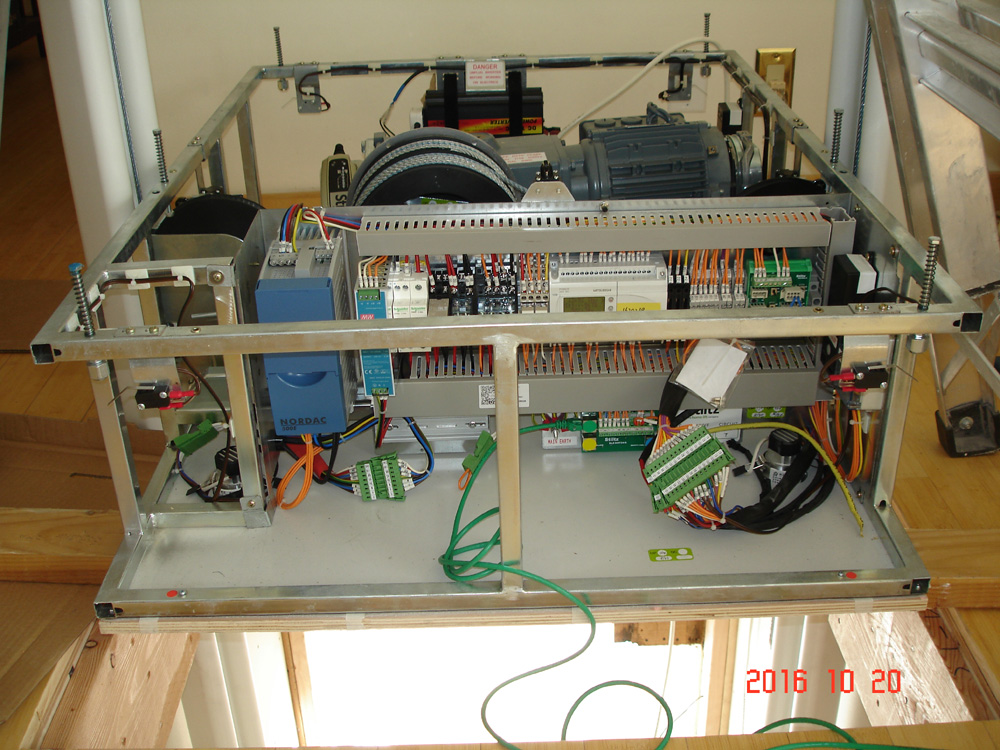
Getting ready to hoist the control panel and motor up in preparation
for
attaching the elevator cab underneath. |
7

Unshackling the chains whereby this thing hoisted itself upstairs. |
8
It's temporarily supported over the abyss by 2x4s
underneath.
|
|
9
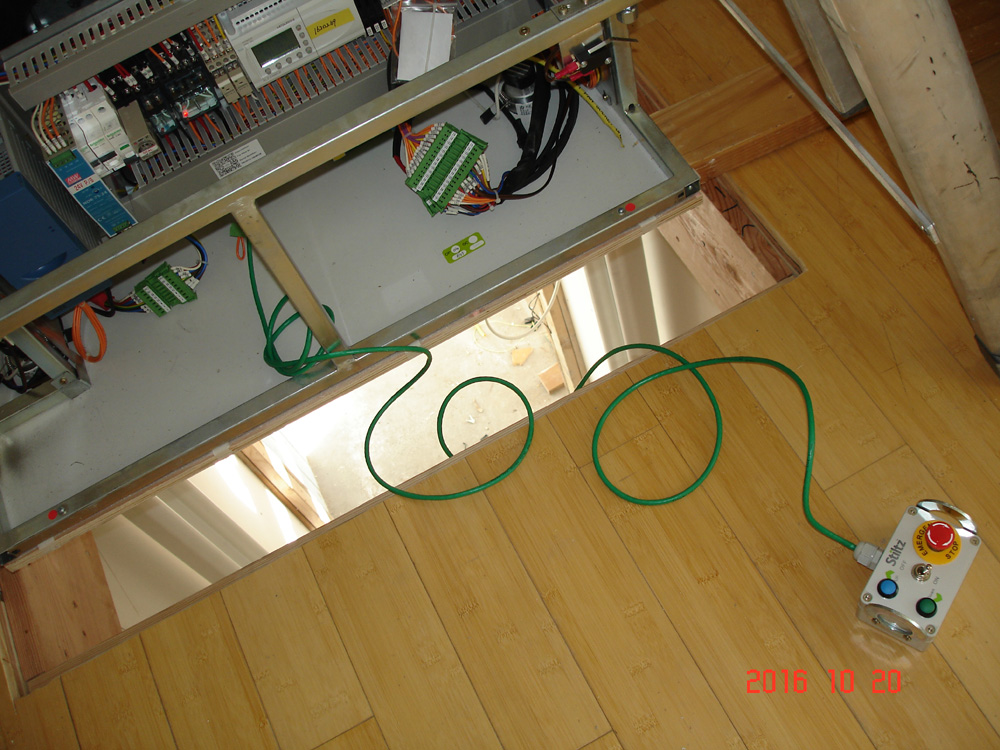
For now, a wired control can make the thing go up and down. |
10
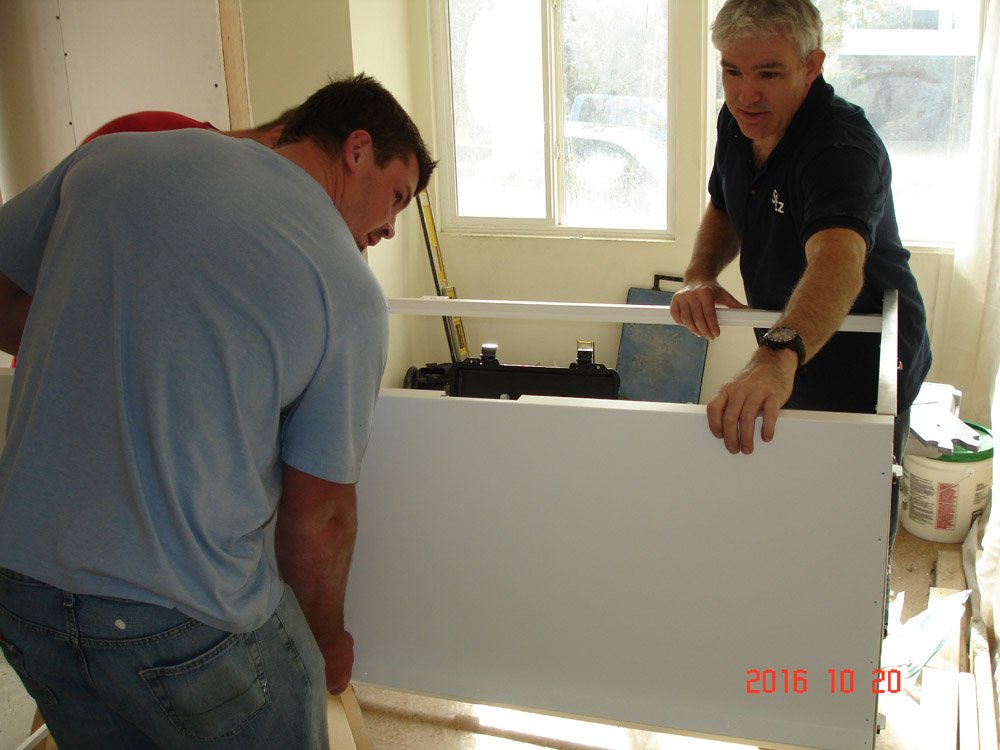
Meanwhile, downstairs, the elevator cab is assembled.
|
11
The sides of the cab are riveted onto the frame. Stiltz's
Henk van
den Ende is showing the people form
Western Stair Lifts how it's done. I'm told
that this is STILTZ'S first installation in our state. |
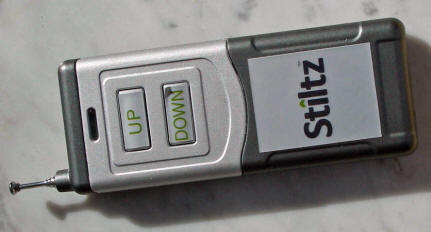
There are two
remote controls.
|
12
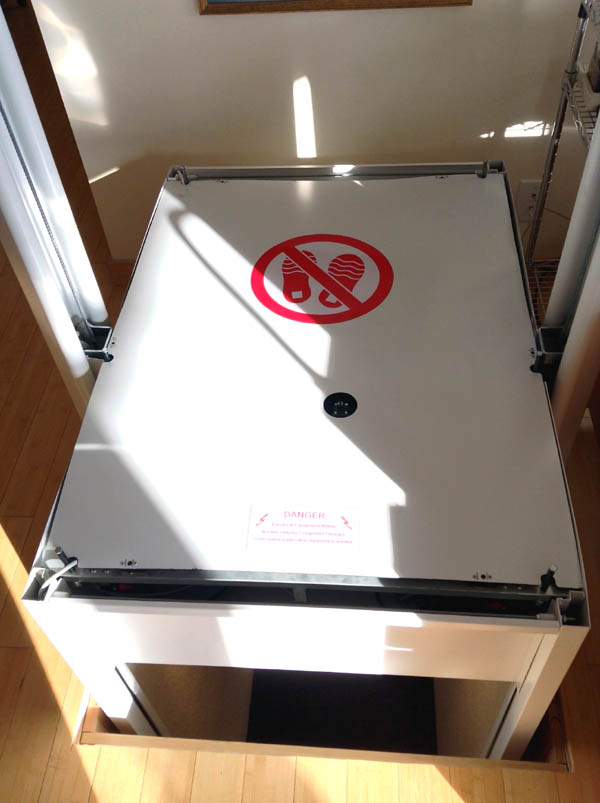
The underside of the elevator cab before its skirt is attached.
|
13
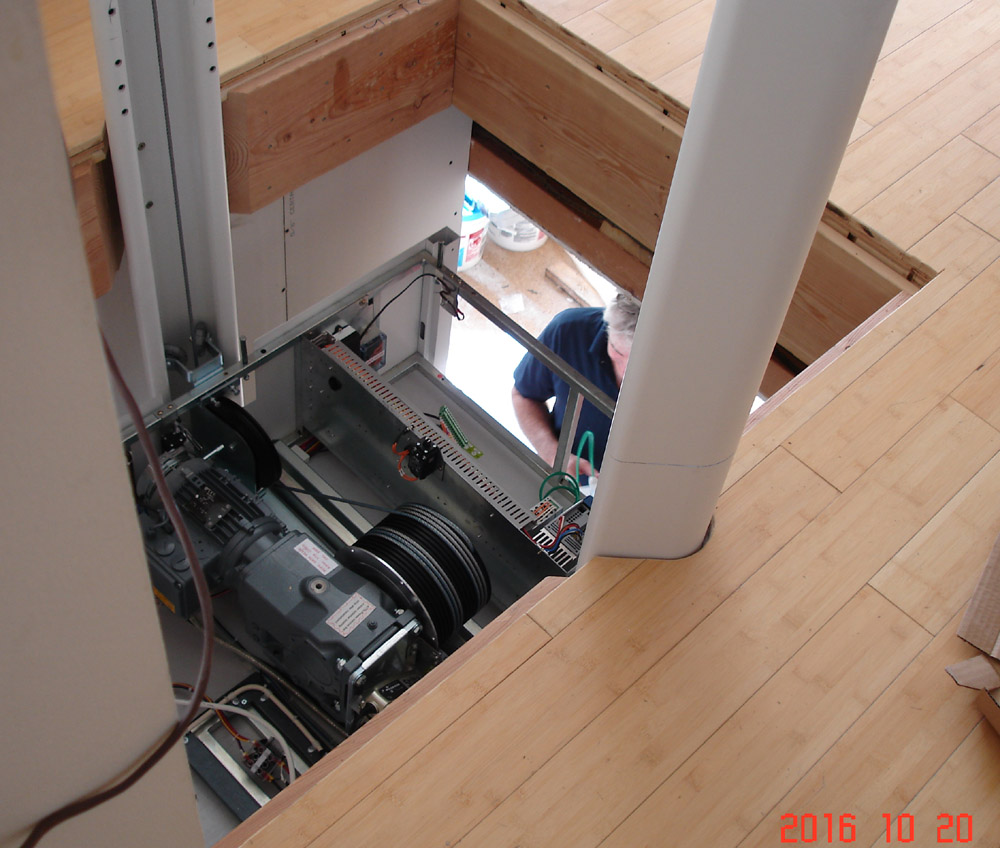
The elevator is made in the UK. Its motor is from Germany. |
|
|
Let's try this thing now... It works!
Just now, the cab disappeared to the floor below.
Qian-Qian, Daniel and Henk look on.
Qian-Qian is very excited.
Tomorrow Stiltz will complete the installation. |
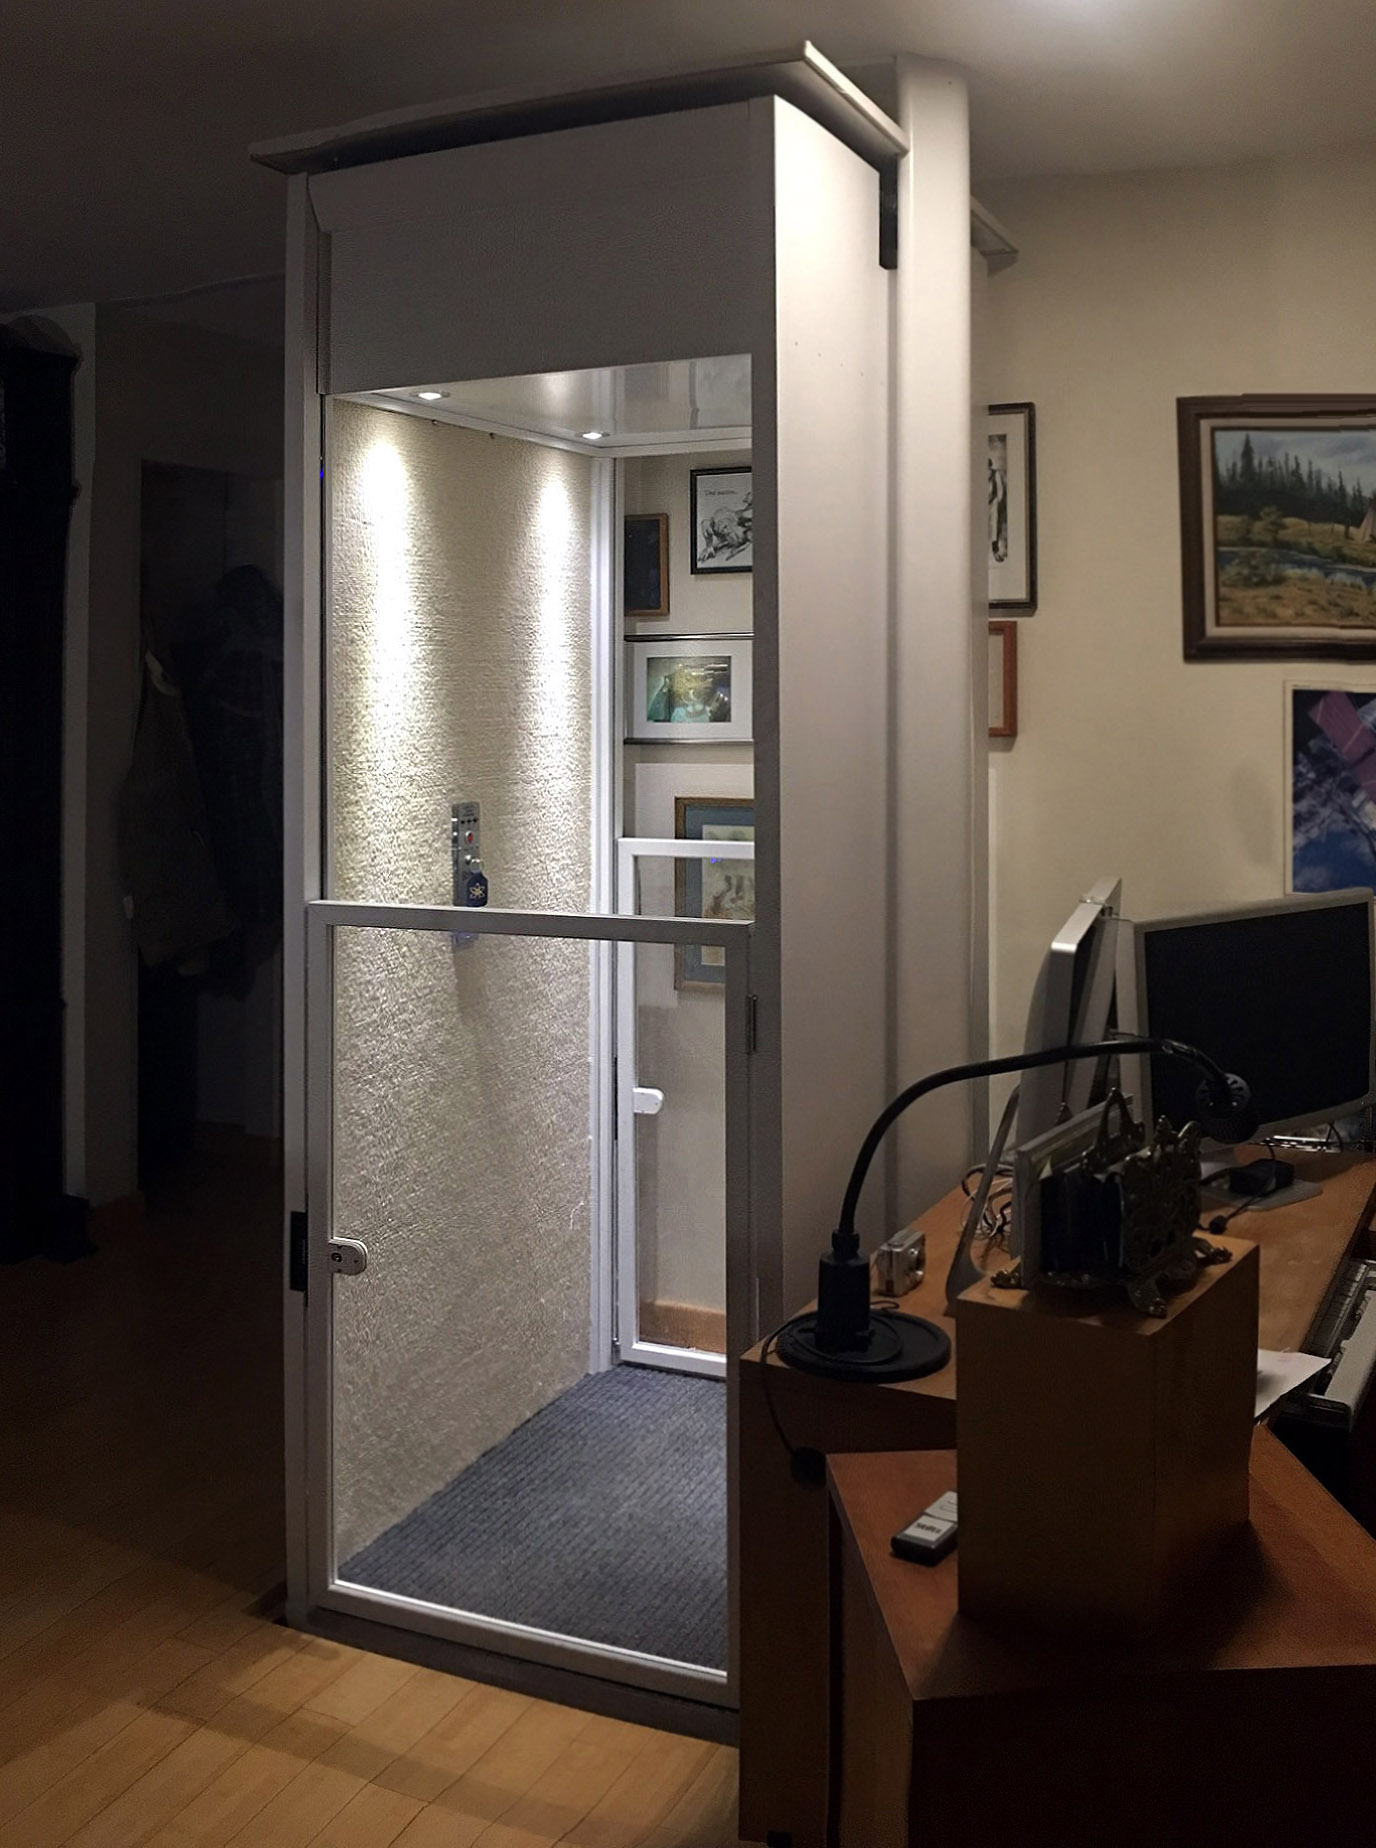
|
Inside Cab Dimensions |
| With: |
31
in. |
| Depth: |
42 in. (door
to door) |
| Height: |
76 3/8 in. |
|
Stiltz TRIO -- Capacity 2 People. |
|
Upstairs, minimal rearrangement: before and
after - |
|

2016 10
11 ... before. |
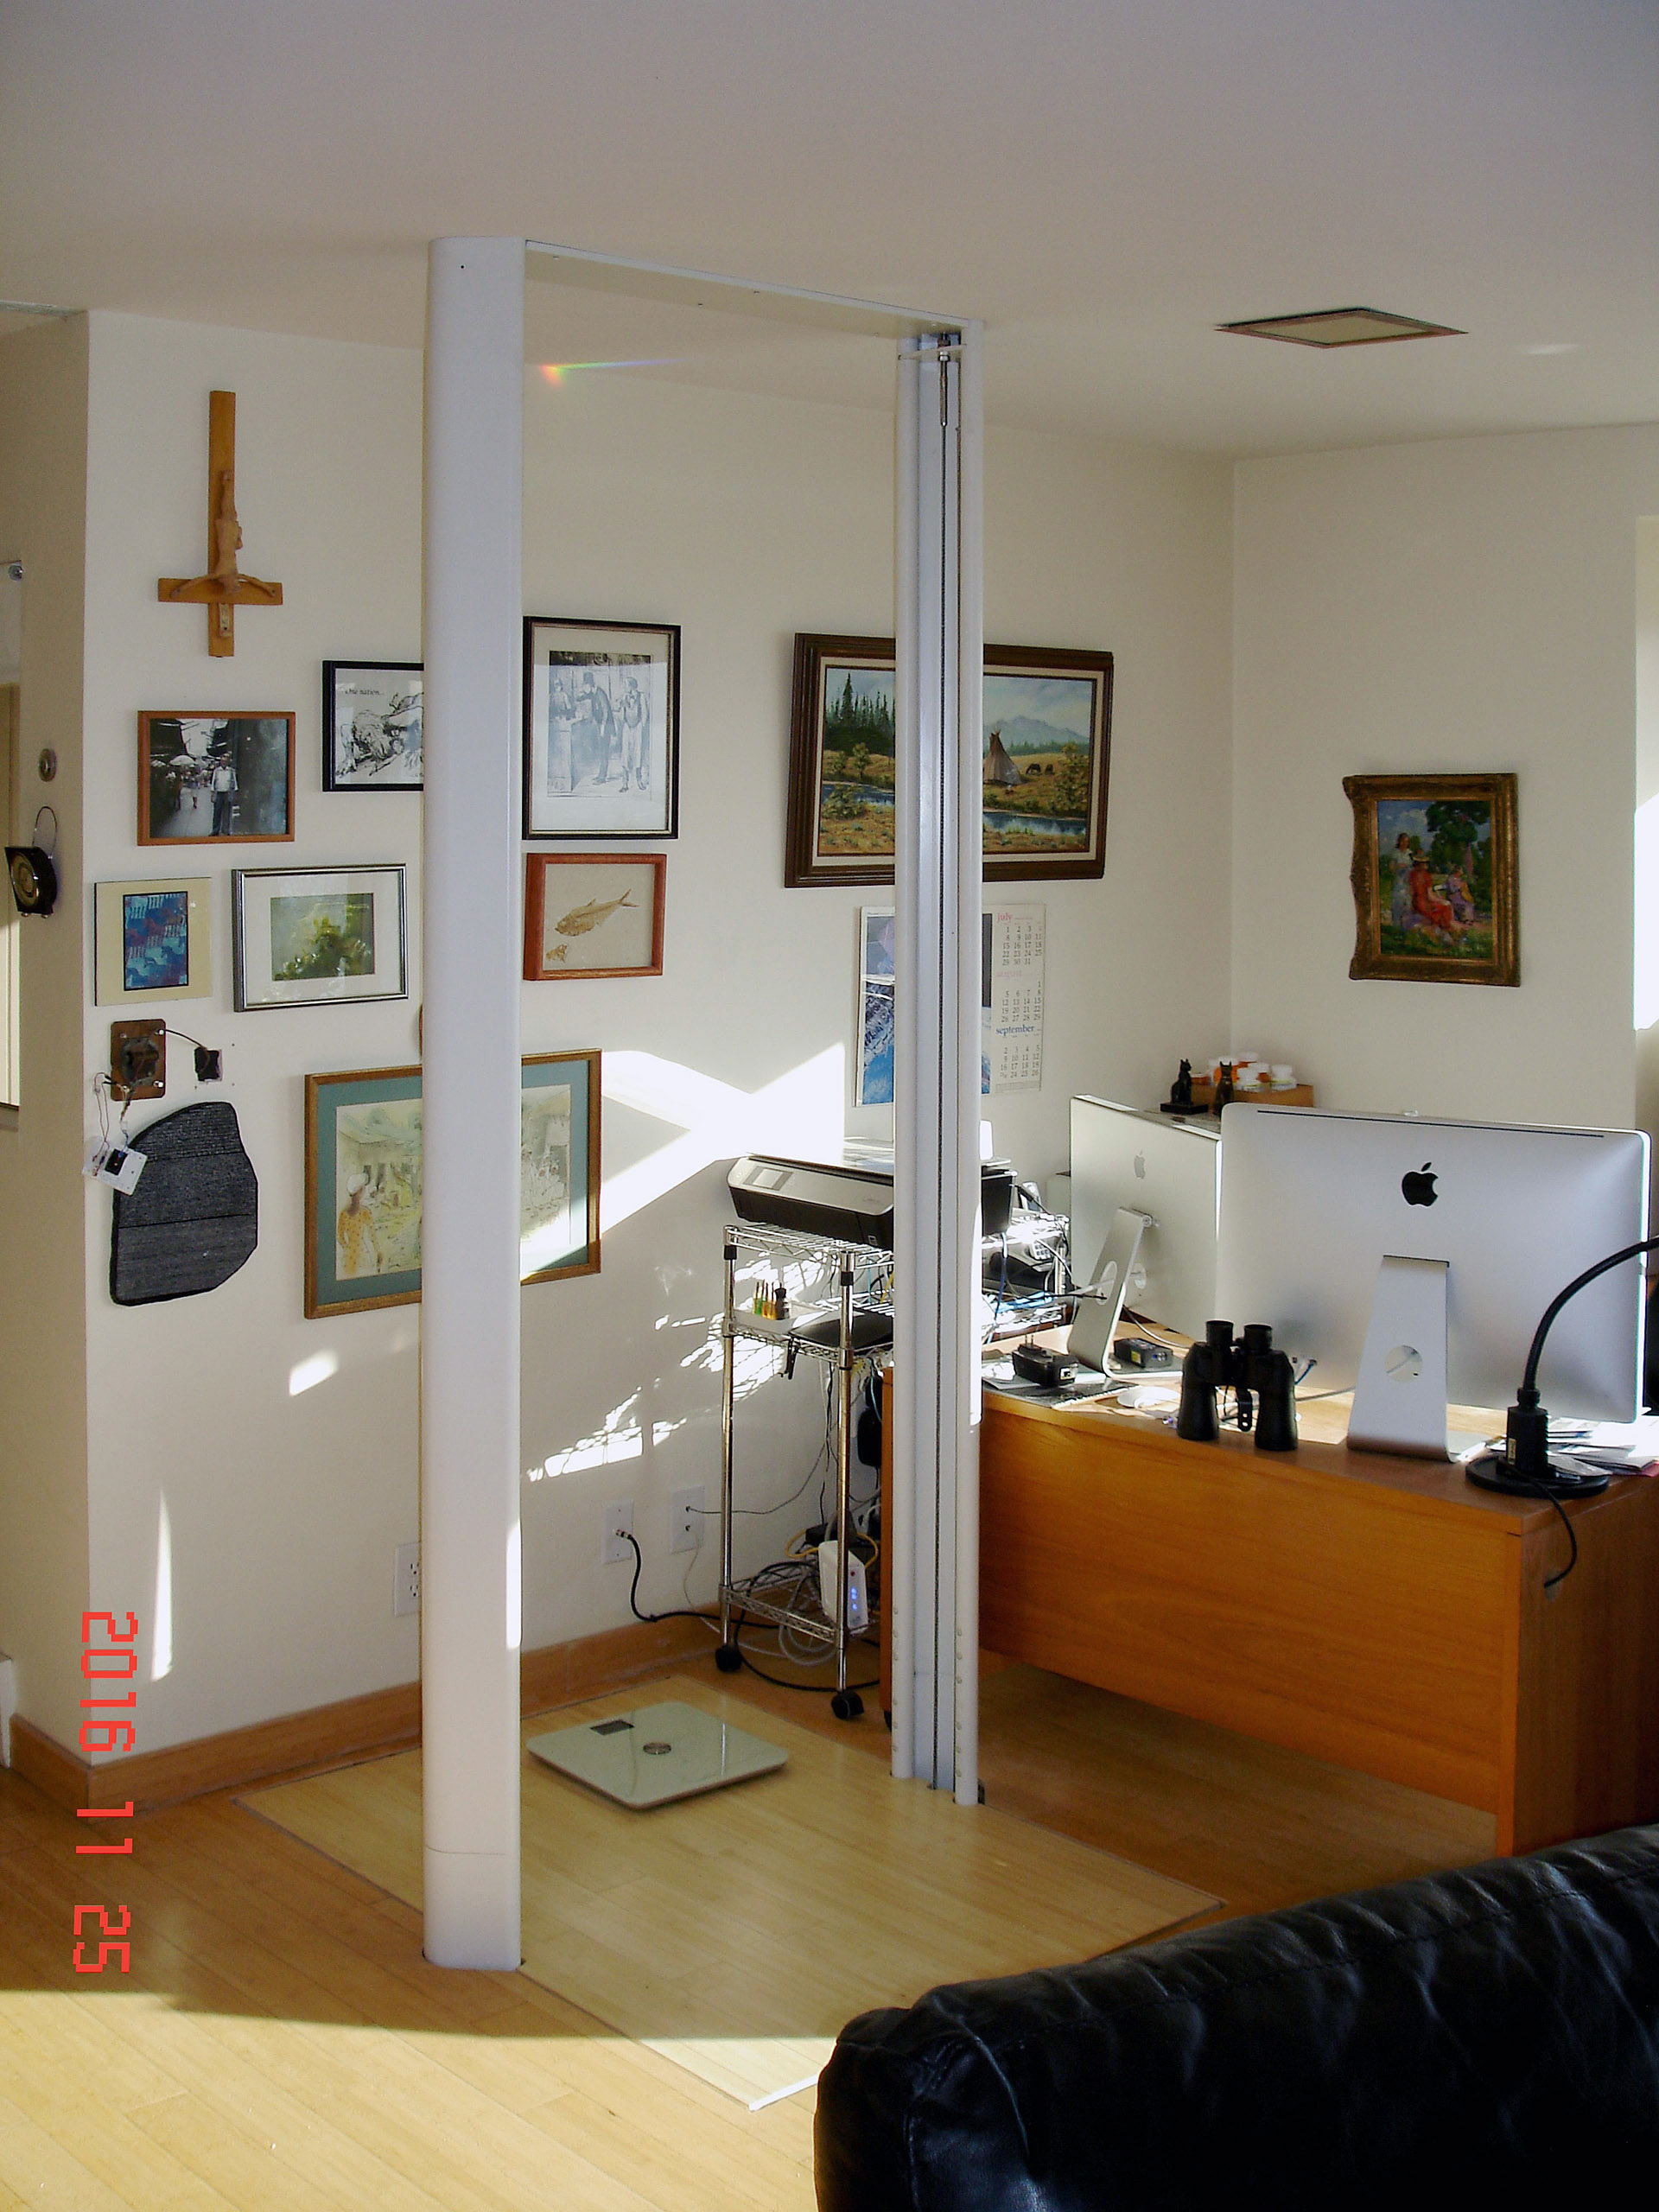
2016 11
...after -- with new bamboo flooring. |
|
|
2016
10
26
 |
 |
|
Meanwhile more things
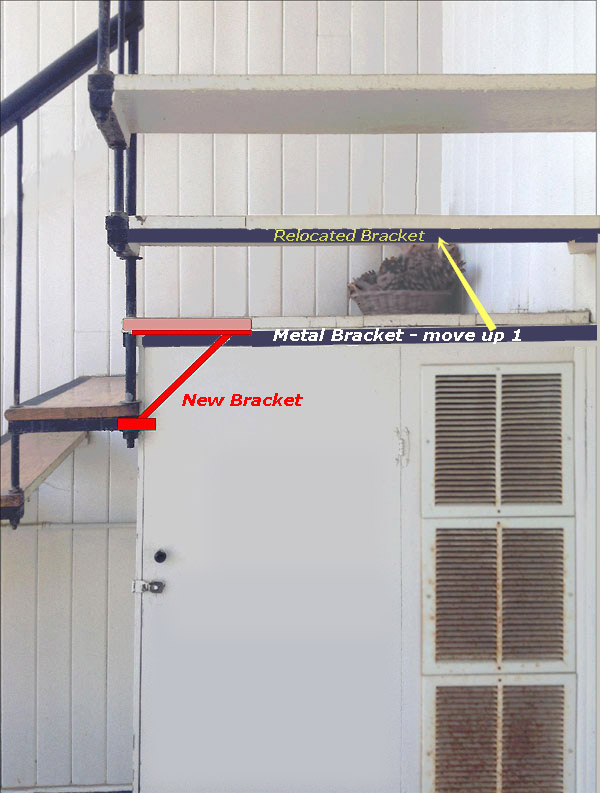
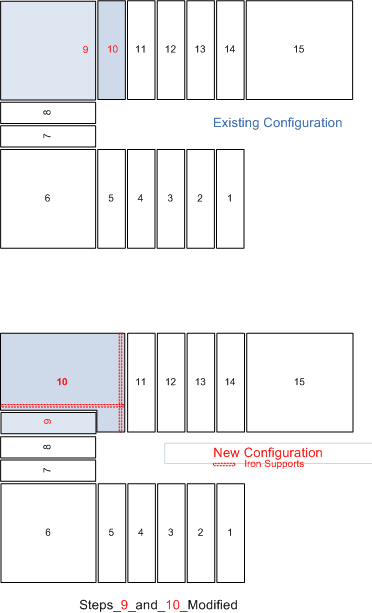
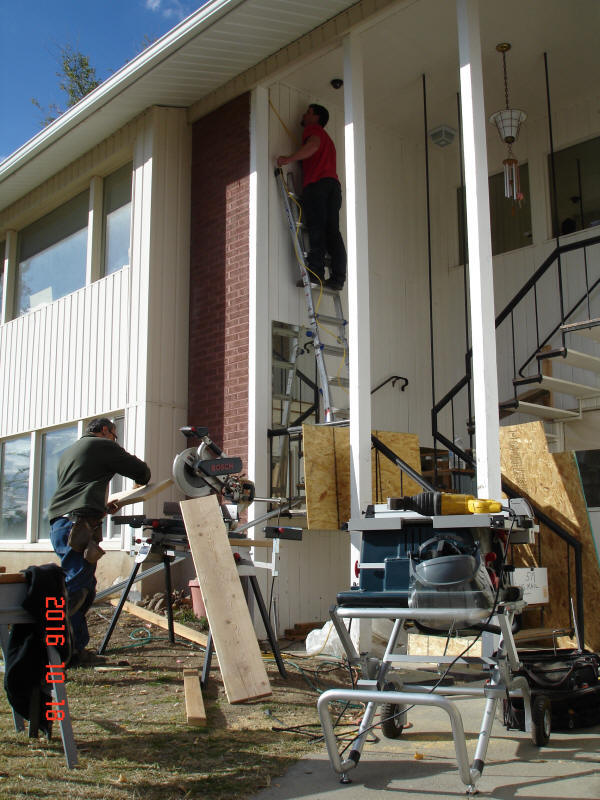
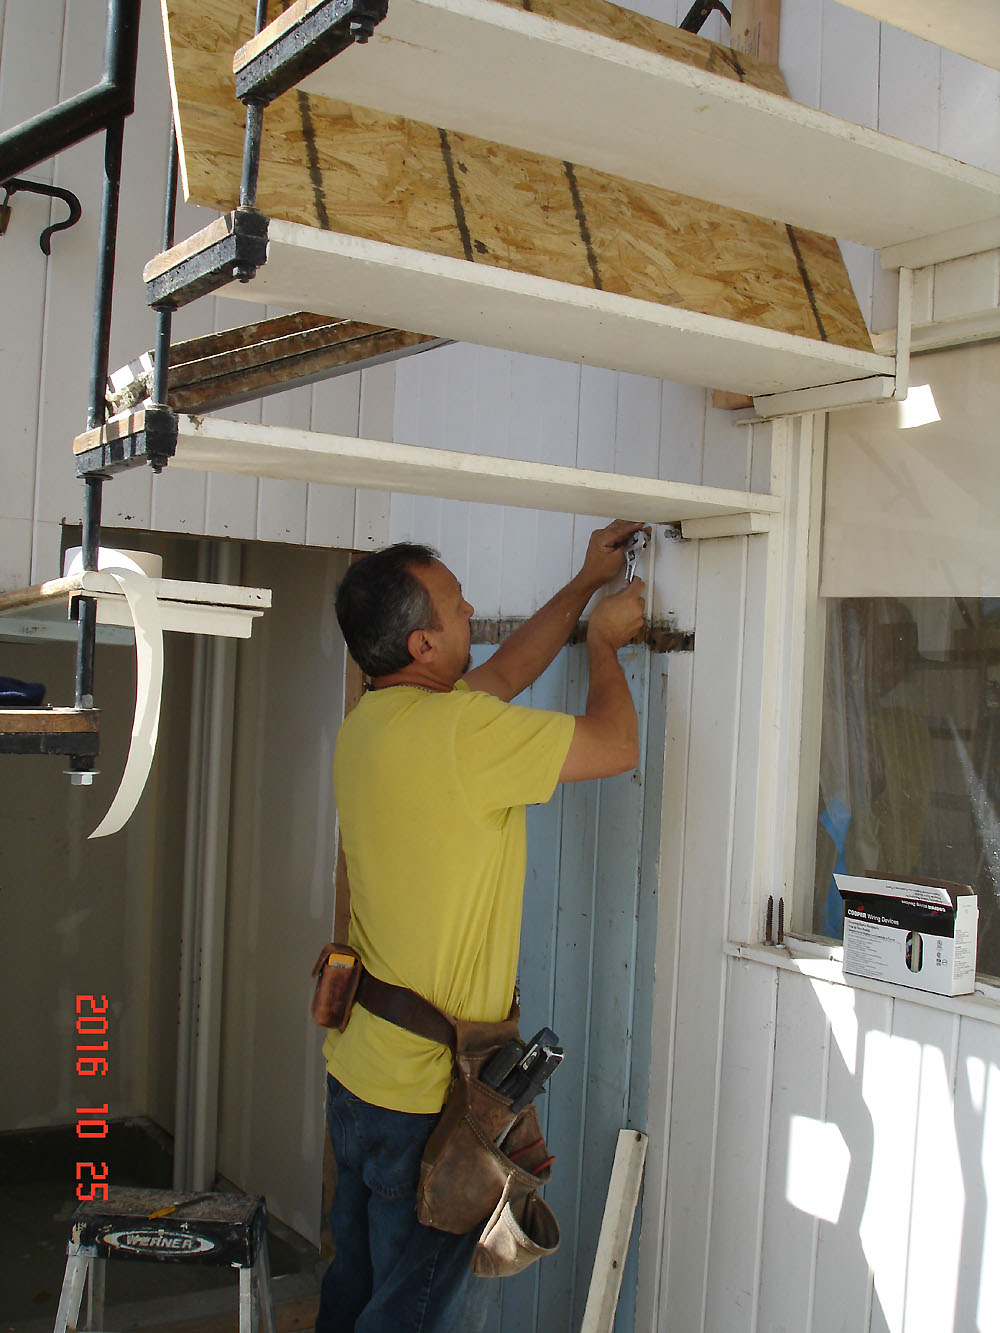
need to be done downstairs: The outside stairs and the entry. Daniel is readjusting the
stairs -- He's going to raise the corner landing platform up one step to allow for better headroom at the
elevator entrance below.
|
|
 |
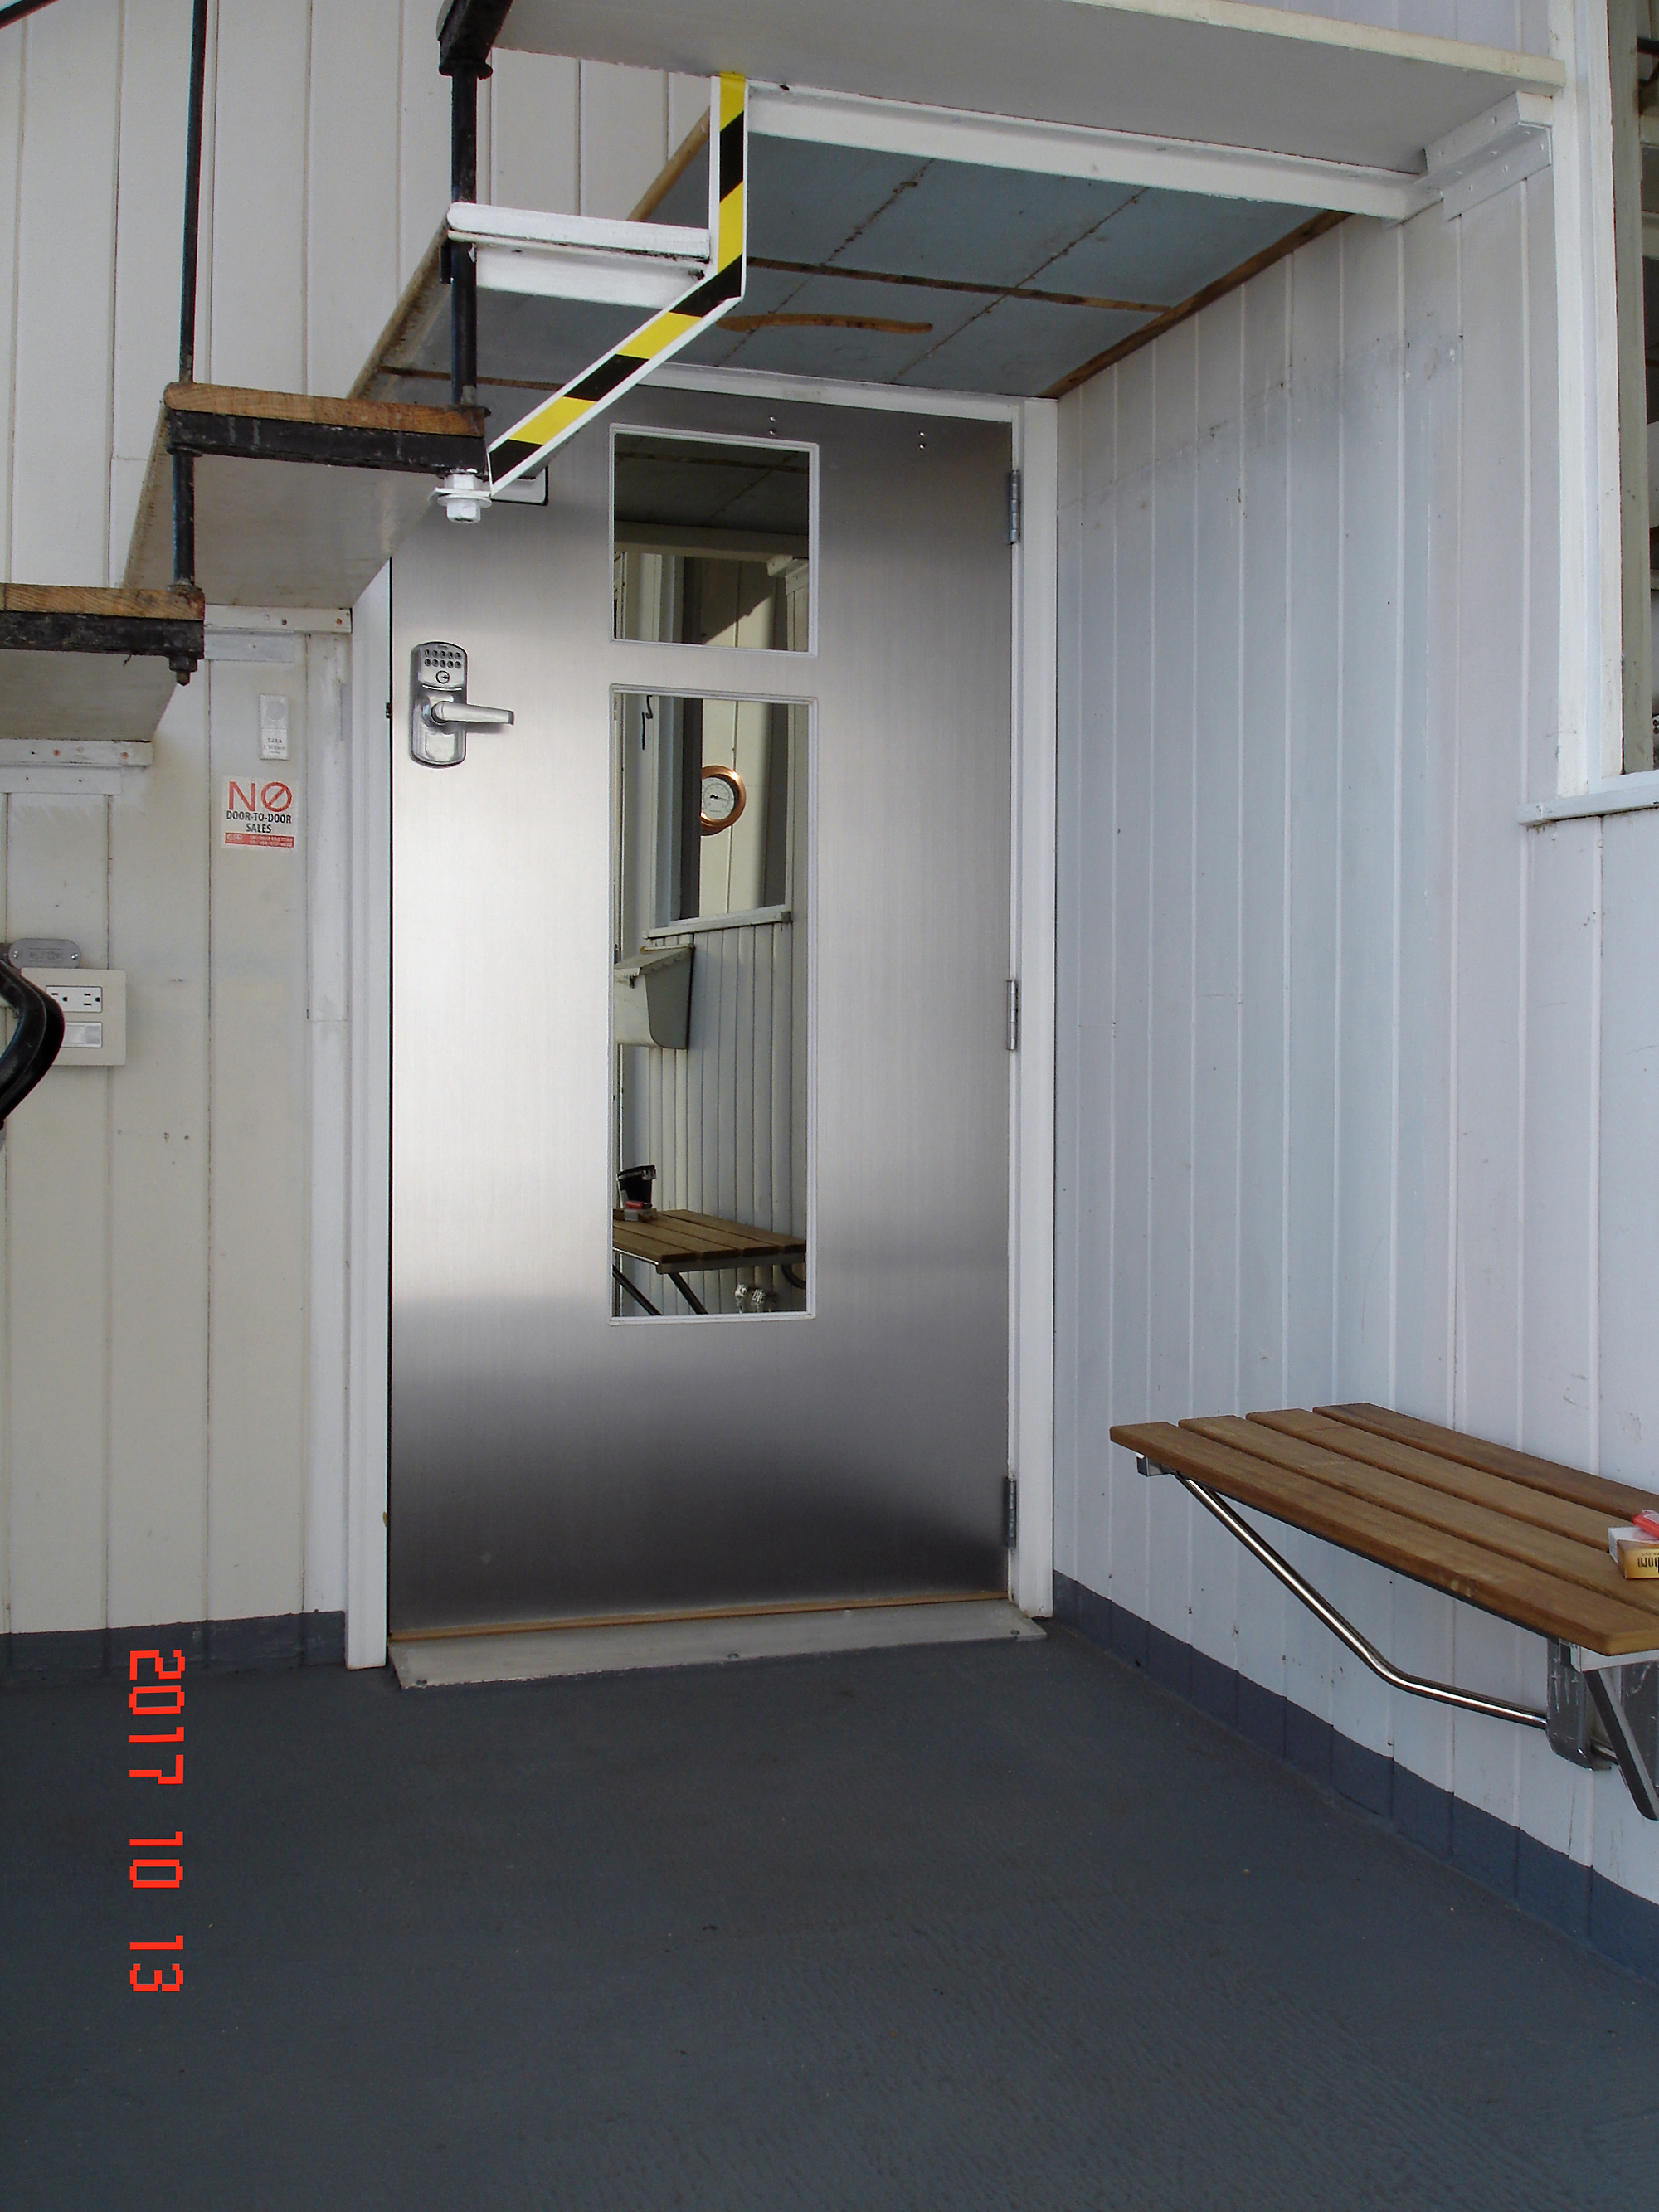
The "Utah" door. It's shaped like the
map of Utah. Above,
metal cladding is being applied -- we want to make it look a bit like a
real elevator door. There's going to be an electric door release
here... |
|
 |
... and there's a doorbell downstairs.
It's
wireless and it doesn't need a battery!
From Amazon.
|
|
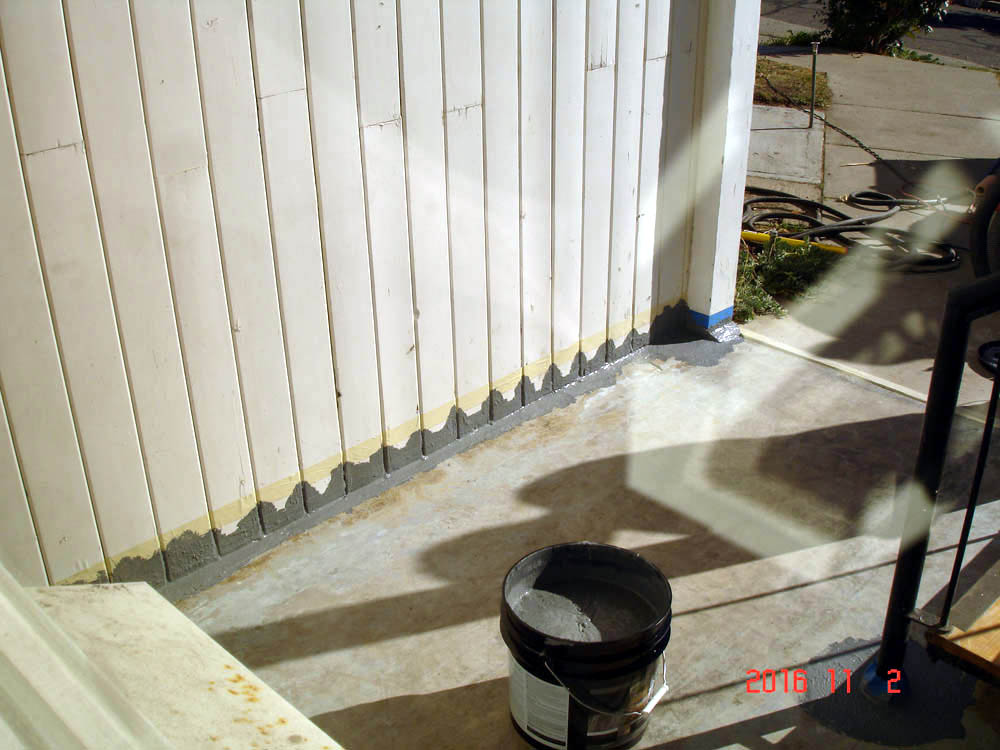
Goop is starting to be applied to the
entrance floor;
it's going up the siding a bit. |
 |
 |
|
The entrance is finished. This is
what it looks like after Daniel hung the door and applied the gray goop to
the floor. |
2016 11 14
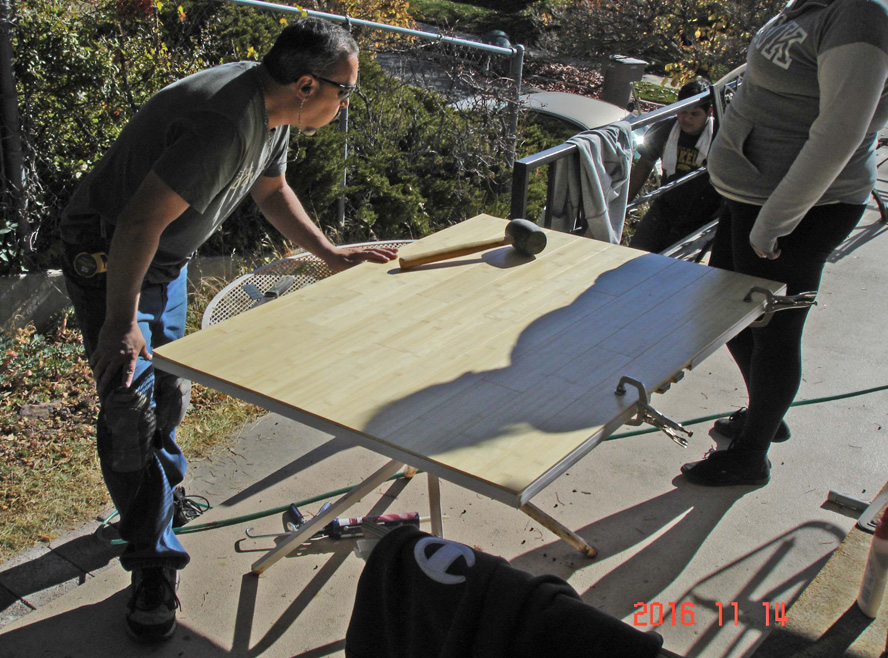
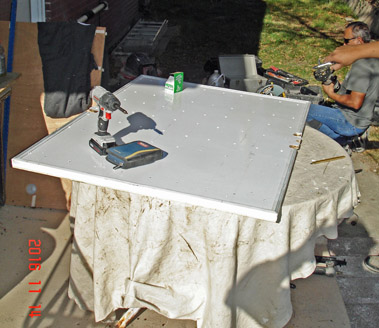
The elevator's cover plate gets
some bamboo flooring, glued and screwed on from underneath.
|
|
To recapitulate - |
|
Before
 |
After
|
|
This is what the outside looked
like before we started & what it looks like now, after the project is
finished. |
|
| |
Downstairs: before & after -

Once upon a time there was an air conditioner in the wall downstairs; QQ
& Sandy celebrate because the apartment cleaning is finished.
|
 |
|
|
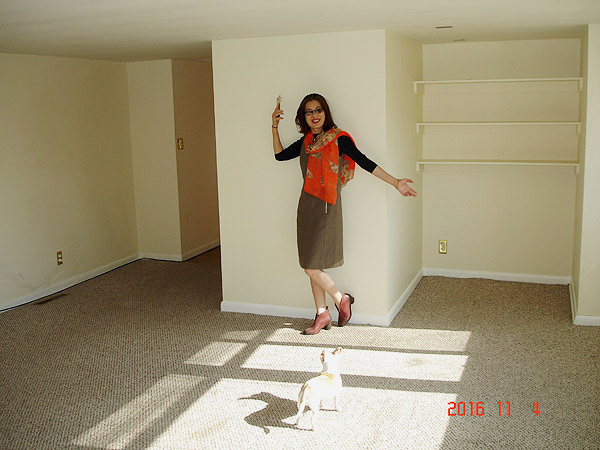
Now QQ is excited because the
elevator shaft is finished.
There are now some new shelves. Bing Bing looks on.
|
|
|
|
2016 11 7
 |

 This
(blue arrow) shows the location of the switch to flip if you want to This
(blue arrow) shows the location of the switch to flip if you want to
override a door interlock ( I removed one door).
Preston
of
Western Stair Lifts returned to correct some conduit
routing of the 220v power line. |
|
|
2016
11 7
The dust cover under the
flooring...
it
arrived a bit late because it had been damaged in
sipping, but now it's here. |
2017
Here's one thing STILTZ doesn't provide - A kick plate.
That nice Berber carpet goes from ceiling to floor.
It's going to get dirty and needs a kick plate to protect it.
I bought an acrylic thing from Amazon. |
STILTZ video: Door electrical connection.
(More
STILTZ videos.)
How to do without one or more doors of your elevator.
I did that; I removed this (downstairs entrance) door from my elevator. |
|
Get it on Amazon

Elevator
Kick Plate

Outside
Door Lock

Door Latch

Door Bell

Door
Grab Bar

A Review:
BOSCH
Digital
Distance
Measurer
|
It's a
Beautiful Machine
I've searched a long time
for an elevator. I'd contacted
many vendors /
manufacturers.
I started looking in 2012
and went to several places to see their installations. The next summer, Lowry Foster of
Nationwide Lifts gave me a demonstration of an installation in
Loveland, Colorado. (Unfortunately we got stuck mid-floor in this
Savaria V-1054 lift during the demo.) The same year,
Paolo Restaino of Domus Lift flew here from Milan, Italy, to take
look at my elevator needs, offering to sell me one for around $16,500,
sans installation. In 2014 I visited a Savaria
installation, an outdoor unit, in Salt Lake City, UT.
(Again, my wife and I got trapped inside! A kind passerby
opened the door for us from the outside.) In 2016 I was shown a
STILTZ elevator on the internet and I immediately gravitated to it.
I'd visited many places to
check out various lift installations: Loveland CO, San
Diego CA, Salt Lake City UT, Provo UT and I went to the
NAEC
convention in San Antonio, Texas:

Although my TRIO model seemed a bit smaller [~ 14ft2] than the
Savaria units I saw, it seemed to fit the bill and so I
bought it. My STILTZ TRIO is much quieter in operation than every
other home lift I'd investigated; it travels abut 50% faster and uses
less electrical power than most of the other units I saw. Maybe that's
because it's a bit lighter. It's solid, not tinny. I'm very
pleased with my unit. This web blog shows a video of its operation
as well as photos made during its installation and the construction of a
custom elevator shaft with entrance from the outside.
|
Click / tap
to enlarge |
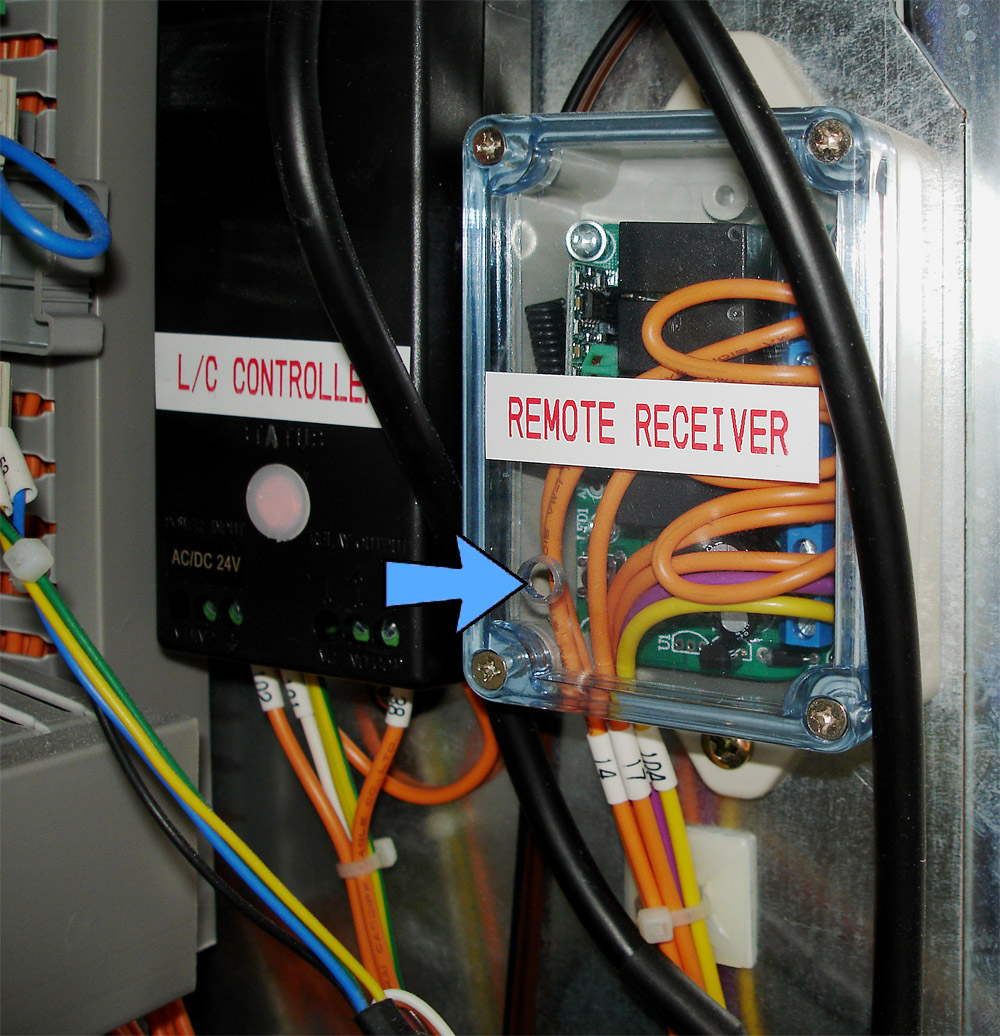
The remote control -
The remote controls seems
less solid solid than the one for your TV. They use AAA
batteries, instead of the more substantial AA ones.
The range is
extensive; I've activated my elevator from across the
street, half way down the block. They're not Wi-Fi, which in my opinion is a good
thing, and their radio transmission are keyed to one
particular elevator.
To mate a remote,
one removes the access panel over the elevator door (two
screws, inside, above the front door). On the elevator
wall (right) is a plastic housing labeled REMOTE RECEIVER.
Insert a small screw driver into the hole (arrow) of the
plastic housing cover. Depress the switch underneath and
simultaneously depress the UP button on the remote
control. That's it - the remote is now paired with the
elevator. |
I
try
to be accurate in showing everything and if there are any mistakes or
omission I welcome the reader to
contact me and I'll ask the web guy to fix it.
Design &
Improvements
The overall idea, concept,
construction and design are excellent, I think. Some aspects seem
a little old-school; others might be done differently. For example
–
Kick plate -
It's wall-to-floor carpet on
all sides. That's nice, but the bottom of the carpet is going to
get dirty. Buy a
kick-pate!
The safety stop -
the safety feature (it works!)
on the bottom surface of the cab, which stops the elevator if it meets
an obstruction, could be modernized
–
say, with redundant radar,
sonar or
laser as is used here, or the auto-focus technology of today's
cameras. I think it would be quite cheap to implement something like
this. As is, some of the design aspects seem a bit dated.
For instance, the STILTZ design has a cloth "skirt" at the bottom,
under-floor of the cab, in which mechanical things and limit switches
are housed. This skirt adds about 10cm or so to the overall height
of the cab. Because of this skirt, one can't enter the cab without
a slight step up. Electronic sensors might eliminate a need for
this skirt. (In my installation, I wanted a level, wheel chair
accessible entry. Thus I had to spend a nice chunk of money to cut
a hole downstairs in the concrete floor where cement was
poured in order to make a
pit
to
allow level entrance.)
The light curtain -
Its placement is inside door
frame of the elevator. When, say, an elbow protrudes, the elevator
comes to a halt. In operation, this happens often when
two people occupy the cab. It's irritating and a naïve user shouldn't
have to worry about this. If this full length, top-to-bottom light
curtain had been installed near the outside surface of the elevator cab,
we'd have almost two more inches of elbowroom in the cab. A
misplaced toe or pants cuff shouldn't cause a full stop! And the
dog wouldn't bring the thing to a halt when she presses her snout
against the glass of one of the two cab doors.
|
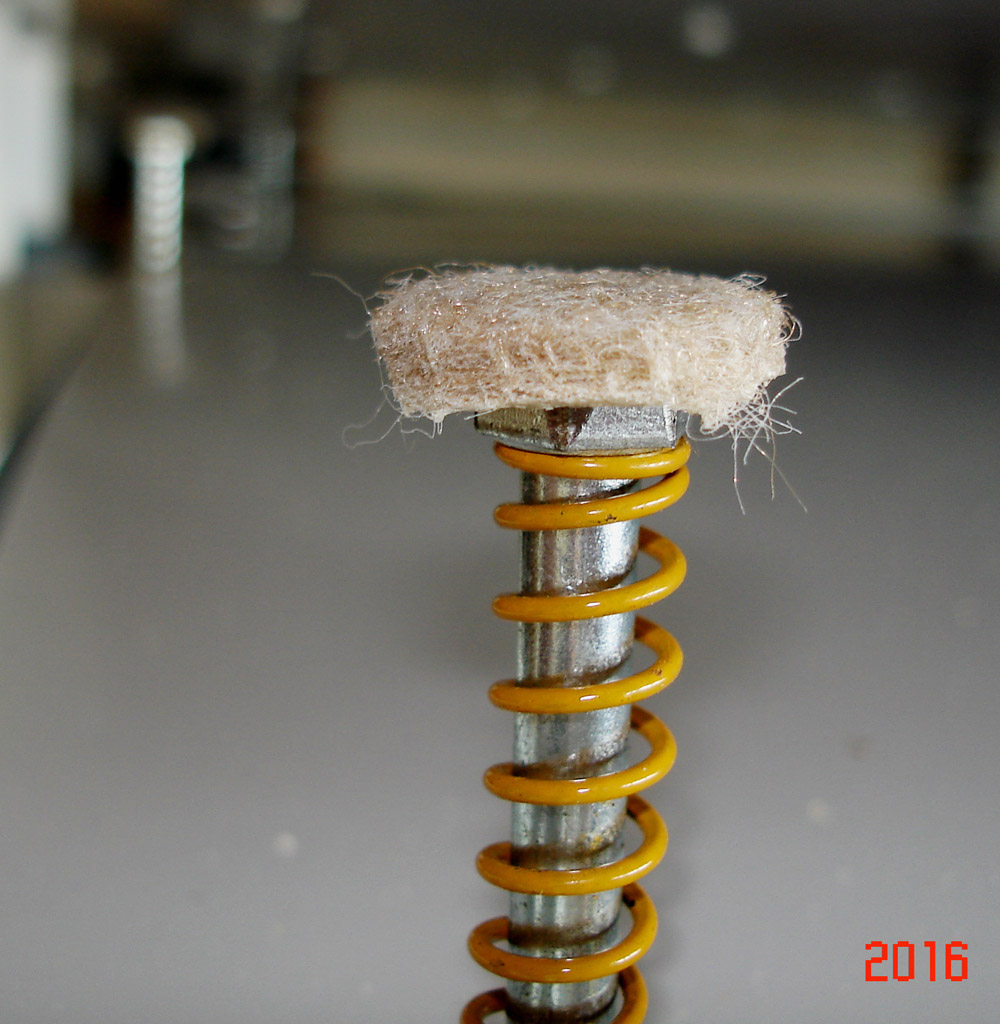
The
'no-noise' -
This elevator is the quietest
home elevator I've investigated. But - it makes an awful clunking
racket when -- on its way up -- the top of the cab meets the floor
cutout, the elevator's
cover piece. This piece continues to
travel up further with the cab. There are are six posts at the top
of the cab which simultaneously make contact with the floor
cutout as the elevator climbs. The solution to diminish this noise
is to put a small felt pad
atop of these posts (or stick them onto the
bottom of the floor piece). STILTZ does not provide such felt pads.
It makes a world of difference!
Here's one thing STILTZ could provide - padding.
STILTZ provides
several sets of springs of various strengths, which one can use
to choose the pressure level at which a weight atop of the
floor piece triggers an auto-halt function of a rising
elevator. We chose to replace the black, default
springs with the yellow, medium strong springs. |
Click / tap to
enlarge |
|
|
|

My STILTZ representative -
National Dealer Sales Manager at Stiltz Home
Lifts.
|

My STILTZ representative -
Madeline Cassino
Sales lead coordinator for Stiltz Home Lifts.
.
|
|
|
|
Letters - |
From: Peter
****<ON
FILE>
Subject: +++ STILTZ TRIO Elevator - Comments +++
Date: May 12, 2017 at 9:56:50 AM MDT
Thanks for the blog. Two questions.
How deep (shallow) does the pit have to be to make it level?
I can't get my head around why the floor cover does not impact the second
floor ceiling. If the lift has to rise 8' plus the depth of the floor, say
1', that is more than the height of the room above. What am I missing?
Thanks
Peter
|
From: Mike
****<ON
FILE>
Subject: +++ STILTZ TRIO Elevator - comments +++
Date: February 12, 2018 at 3:27:31 PM MST
Just a thank you for the site.
I've been looking into Stiltz, and it was great to see a detailed account of
your experience and installation.
I was a bit shocked by the
$47k total cost, but it appears you had some curve balls thrown at you. What
do you estimate cost would be if installing in new construction, and all the
site work has been taken into consideration?
Thanks again.
|
|
|
|